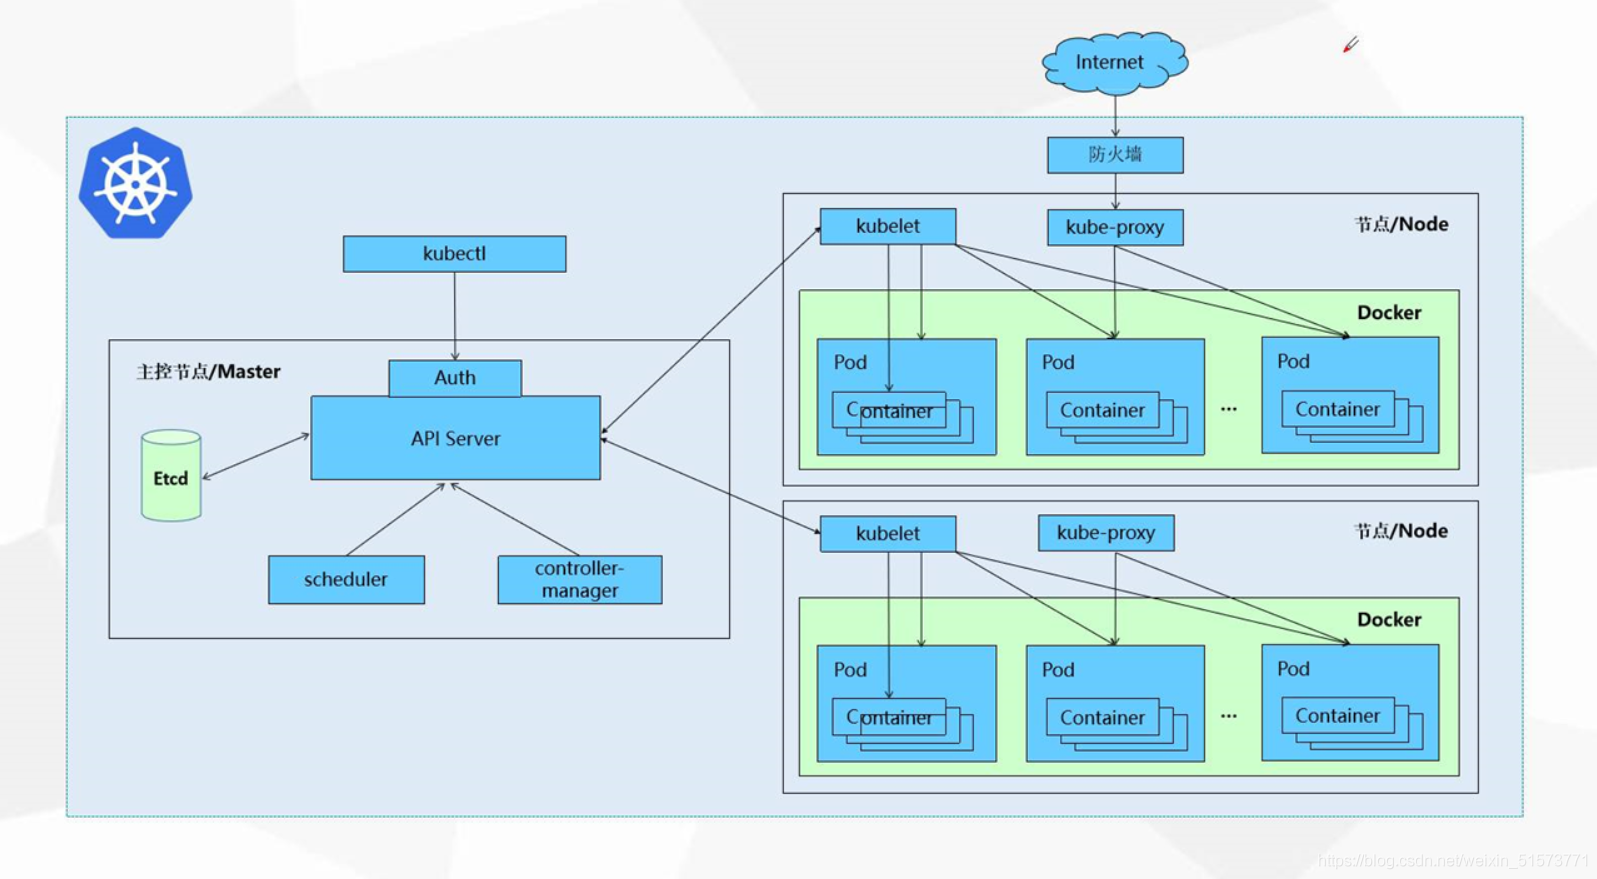
Pod是有生命周期的,使用凡人皆有一死来描述pod很贴切,当一个工作节点(node)销毁时,节点上运行的pods也会被销毁, ReplicationController会动态地在其他节点上创建Pod来保持应用程序的运行,每一个Pod都有一个独立的IP地址,甚至是同一个节点上的Pod,可以看出Pod的IP是动态的,它随Pod的创建而创建,随Pod的销毁而消失,这就引出一个问题:如果由一组Pods组合而成的集群来提供服务,那如何访问这些Pods呢?
Kubenetes的Service就是用来解决这个问题的。一个Service可以看作一组提供相同服务的Pods的对外访问接口,Service作用于哪些Pods是通过label selector来定义的,这些Pods能被Service访问,Pod之间的发现和路由(如应用中的前端和后端组件)由Kubernetes Service处理。
Service有四种type: ClusterIP(默认)、NodePort、LoadBalancer、ExternalName. 其中NodePort和LoadBalancer两类型的Services可以对外提供服务。
这是使用NodePort来配置
1、创建yaml service.yaml
---
apiVersion: v1
kind: Service
metadata:name: kube-node-servicelabels:name: kube-node-service
spec:type: NodePort      #这里代表是NodePort类型的ports:- port: 8080        #这里的端口和clusterIP对应,即ip:8080,供内部访问。targetPort: 8080  #端口一定要和container暴露出来的端口对应protocol: TCPnodePort: 32143   # 所有的节点都会开放此端口,此端口供外部调用。selector:app: web          #这里选择器一定要选择容器的标签,之前写name:kube-node是错的。
2、应用yaml
kubectl create -f service.yaml
3、检验配置是否正确
//测试主节点访问
[root@k8s-node1 k8s]# curl 192.168.100.89:32143/index
hello,world[root@k8s-node1 k8s]# kubectl get services
NAME                TYPE        CLUSTER-IP     EXTERNAL-IP   PORT(S)          AGE
kube-node-service   NodePort    10.96.77.110           8080:32143/TCP   21m
kubernetes          ClusterIP   10.96.0.1              443/TCP          4d//测试内部访问(clusterIp:PORT)
curl 10.96.77.110:8080[root@k8s-node1 k8s]# curl 10.96.77.110:8080/index
hello,world[root@k8s-node1 k8s]# kubectl get pods -o wide
NAME                        READY   STATUS    RESTARTS   AGE   IP            NODE        NOMINATED NODE   READINESS GATES
kube-node-87dcfc9cf-9kj8j   1/1     Running   0          75m   10.244.1.23   k8s-node3
kube-node-87dcfc9cf-l2ppz   1/1     Running   0          75m   10.244.2.24   k8s-node2              [root@k8s-node1 k8s]# curl 10.244.1.23:8080/index
hello,world[root@k8s-node1 k8s]# curl 10.244.2.24:8080/index
hello,world//测试slave节点访问
[root@k8s-node1 k8s]# curl 192.168.100.91:32143/index
hello,world
[root@k8s-node1 k8s]# curl 192.168.100.92:32143/index
hello,world从浏览器访问测试 http://192.168.100.89:32143/indexhttp://192.168.100.91:32143/indexhttp://192.168.100.92:32143/index
使用命令创建svc
[root@10-60-151-251 ~]# kubectl create service nodeport iam --tcp=30403:30403 -n iam
然后编辑svc文件
[root@10-60-151-251 ~]# kubectl edit svc iam -n 597c53da989144218747af0e2d5d2abb-75
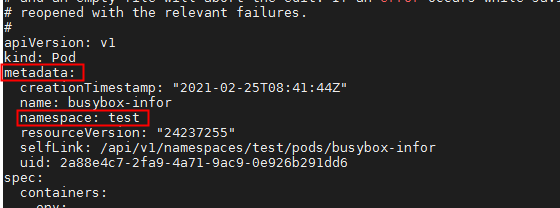
# Please edit the object below. Lines beginning with a '#' will be ignored,
# and an empty file will abort the edit. If an error occurs while saving this file will be
# reopened with the relevant failures.
#
apiVersion: v1
kind: Service
metadata:creationTimestamp: "2020-08-21T10:01:32Z"labels:app: iamname: iamnamespace: 597c53da989144218747af0e2d5d2abb-75resourceVersion: "12105916"selfLink: /api/v1/namespaces/597c53da989144218747af0e2d5d2abb-75/services/iamuid: 4a842467-e395-11ea-8efb-005056bfbff0
spec:clusterIP: 10.110.252.74externalTrafficPolicy: Clusterports:- nodePort: 30403    #这个是node对外暴露的端口  外界可以通过 node_ip+ port的形式访问port: 30403       #这个是pod对外暴露的端口 可以在集群内部方位此端口protocol: TCPtargetPort: 6661  #修改为iam项目的docker容器对外暴露的端口 selector:app: iamsessionAffinity: Nonetype: NodePort
status:loadBalancer: {}


 京公网安备 11010802041100号