热门标签 | HotTags
当前位置:  开发笔记 > 编程语言 > 正文

c#轻松实现屏幕截图效果

基本原理:基本截图的功能主要靠响应主窗体的鼠标按下、鼠标移动、鼠标抬起几个事件的功能来实现的。截取的图片区域使用“Label”组件来显示,需要重新实现“Label”组件的“Pain

基本原理:
基本截图的功能主要靠响应主窗体的鼠标按下、鼠标移动、鼠标抬起几个事件的功能来实现的。截取的图片区域使用“Label”组件来显示,需要重新实现“Label”组件的“Paint”方法。
左键单击开始截图,右键单击取消截图,双击鼠标左键完成截图,将截取的图片保存到Windows剪贴板中。
添加“Label”组件
工具箱》公共组件》双击“Label”组件,修改组件属性:

Name=lbl_CutImage,

AutoSize=False,

BackColor=Transparent,

Text = “”

“Form1_Load”事件添加代码:

[csharp] view plaincopyprint?01.this.lbl_CutImage.Hide();
this.lbl_CutImage.Hide();
定义截图功能依赖的基本变量
[csharp] view plaincopyprint?01.#region 截图基本变量
02.///

03./// 用于判断是否已经开始截图,控制信息框是否显示。
04.///
05.private bool isCuting;
06.///
07./// 鼠标按下的点
08.///
09.private Point beginPoint;
10.///
11./// 最终确定的绘图基点
12.///
13.private Point endPoint;
14.///
15./// 用于记录截图显示区域的大小(包括调整块的区域,调整区域边框宽度2px)
16.///
17.private Rectangle cutImageRect = new Rectangle(0, 0, 5, 5);
18.#endregion

#region 截图基本变量
///


/// 用于判断是否已经开始截图,控制信息框是否显示。
///

private bool isCuting;
///
/// 鼠标按下的点
///

private Point beginPoint;
///
/// 最终确定的绘图基点
///

private Point endPoint;
///
/// 用于记录截图显示区域的大小(包括调整块的区域,调整区域边框宽度2px)
///

private Rectangle cutImageRect = new Rectangle(0, 0, 5, 5);
#endregion定义枚举类型:更新UI的模式

[csharp] view plaincopyprint?01.///

02./// 更新UI的模式,用于标记哪些需要显示,哪些需要隐藏;
03.///
04.[FlagsAttribute]
05.public enum UpdateUIMode : uint
06.{

  1. //值得注意的是,如果要使用组合值,那么就不能用连接的数字表示,必须是几何级增长!

  2. NOne= 0,

  3. ShowTextPro = 1,

  4. ShowPenStyle = 2,

  5. ShowToolBox = 4,

  6. ShowInfoBox = 8,

  7. ShowZoomBox = 16,

  8. ShowCutImage = 32,

  9. HideTextPro = 64,

  10. HidePenStyle = 128,

  11. HideToolBox = 256,

  12. HideInfoBox = 512
    19.}

    ///


    /// 更新UI的模式,用于标记哪些需要显示,哪些需要隐藏;
    ///

    [FlagsAttribute]
    public enum UpdateUIMode : uint
    {
    //值得注意的是,如果要使用组合值,那么就不能用连接的数字表示,必须是几何级增长!
    NOne= 0,
    ShowTextPro = 1,
    ShowPenStyle = 2,
    ShowToolBox = 4,
    ShowInfoBox = 8,
    ShowZoomBox = 16,
    ShowCutImage = 32,
    HideTextPro = 64,
    HidePenStyle = 128,
    HideToolBox = 256,
    HideInfoBox = 512
    }
    添加方法:计算并保存截图的区域框的大小

[csharp] view plaincopyprint?01.///

02./// 计算并保存截图的区域框的大小
03.///
04.private void SaveCutImageSize(Point beginPoint, Point endPoint)
05.{

  1. // 保存最终的绘图基点,用于截取选中的区域

  2. this.endPoint = beginPoint;


  3. // 计算截取图片的大小

  4. int imgWidth = Math.Abs(endPoint.X - beginPoint.X) + 1;

  5. int imgHeight = Math.Abs(endPoint.Y - beginPoint.Y) + 1;

  6. int lblWidth = imgWidth + 4;

  7. int lblHeight = imgHeight + 4;


  8. // 设置截图区域的位置和大小

  9. this.cutImageRect = new Rectangle(beginPoint.X - 2, beginPoint.Y - 2, lblWidth, lblHeight);
    17.}

    ///


    /// 计算并保存截图的区域框的大小
    ///

    private void SaveCutImageSize(Point beginPoint, Point endPoint)
    {
    // 保存最终的绘图基点,用于截取选中的区域
    this.endPoint = beginPoint;
    // 计算截取图片的大小
    int imgWidth = Math.Abs(endPoint.X - beginPoint.X) + 1;
    int imgHeight = Math.Abs(endPoint.Y - beginPoint.Y) + 1;
    int lblWidth = imgWidth + 4;
    int lblHeight = imgHeight + 4;
    // 设置截图区域的位置和大小
    this.cutImageRect = new Rectangle(beginPoint.X - 2, beginPoint.Y - 2, lblWidth, lblHeight);
    }

添加方法:执行截图,将选定区域的图片保存到剪贴板
[csharp] view plaincopyprint?01.///

02./// 执行截图,将选定区域的图片保存到剪贴板
03.///
04.///

05./// 是否将图片保存到磁盘
06.///
07.private void ExecCutImage(bool saveToDisk, bool uploadImage) //bool saveToDisk = false, bool uploadImage = false
08.{


  1. // 如果图片获取区域不可见,则退出保存图片过程

  2. if (!this.lbl_CutImage.Visible) { return; }

  3. Rectangle srcRect = new Rectangle();

  4. srcRect.X = this.lbl_CutImage.Location.X + 2;

  5. srcRect.Y = this.lbl_CutImage.Location.Y + 2;

  6. srcRect.Width = this.lbl_CutImage.Width - 4;

  7. srcRect.Height = this.lbl_CutImage.Height - 4;

  8. Rectangle destRect = new Rectangle(0, 0, srcRect.Width, srcRect.Height);

  9. Bitmap bmp = new Bitmap(srcRect.Width, srcRect.Height);

  10. Graphics g = Graphics.FromImage(bmp);

  11. g.DrawImage(this.screenImage, destRect, srcRect, GraphicsUnit.Pixel);


  12. Clipboard.SetImage(bmp);


  13. ExitCutImage(true);
    24.}

    ///


    /// 执行截图,将选定区域的图片保存到剪贴板
    ///

    ///
    /// 是否将图片保存到磁盘
    ///
    private void ExecCutImage(bool saveToDisk, bool uploadImage) //bool saveToDisk = false, bool uploadImage = false
    {
    // 如果图片获取区域不可见,则退出保存图片过程
    if (!this.lbl_CutImage.Visible) { return; }
    Rectangle srcRect = new Rectangle();
    srcRect.X = this.lbl_CutImage.Location.X + 2;
    srcRect.Y = this.lbl_CutImage.Location.Y + 2;
    srcRect.Width = this.lbl_CutImage.Width - 4;
    srcRect.Height = this.lbl_CutImage.Height - 4;
    Rectangle destRect = new Rectangle(0, 0, srcRect.Width, srcRect.Height);
    Bitmap bmp = new Bitmap(srcRect.Width, srcRect.Height);
    Graphics g = Graphics.FromImage(bmp);
    g.DrawImage(this.screenImage, destRect, srcRect, GraphicsUnit.Pixel);
    Clipboard.SetImage(bmp);
    ExitCutImage(true);
    }
    添加方法:退出截图过程
    [csharp] view plaincopyprint?01.///

  14. /// 退出截图过程

  15. ///

  16. private void ExitCutImage(bool hideWindow) // = true

  17. {

  18. this.lbl_CutImage.Visible = false;


  19. this.isCuting = false;


  20. if (hideWindow)


  21. {


  22. this.screenImage.Dispose();


  23. this.Hide();


  24. }


  25. }
    ///

    /// 退出截图过程
    ///
    private void ExitCutImage(bool hideWindow) // = true
    {
    this.lbl_CutImage.Visible = false;
    this.isCuting = false;
    if (hideWindow)
    {
    this.screenImage.Dispose();
    this.Hide();
    }
    }
    主窗口鼠标按下事件处理程序


[csharp] view plaincopyprint?01.///

02./// 截图窗口鼠标按下事件处理程序
03.///
04.///

05.///

06.private void Form1_MouseDown(object sender, MouseEventArgs e)
07.{


  1. // 左键单击事件


  2. if (e.Button == MouseButtons.Left && e.Clicks == 1)


  3. {


  4. if (!this.lbl_CutImage.Visible)


  5. {


  6. this.isCuting = true;


  7. this.beginPoint = e.Location;


  8. this.endPoint = e.Location;


  9. SaveCutImageSize(e.Location, e.Location);


  10. UpdateCutInfoLabel(UpdateUIMode.ShowCutImage | UpdateUIMode.ShowInfoBox);


  11. }


  12. }


  13. // 左键双击事件


  14. if (e.Button == MouseButtons.Left && e.Clicks == 2)


  15. {


  16. if (this.lbl_CutImage.Visible)


  17. {


  18. ExecCutImage(false, false);


  19. }


  20. }


  21. // 右键单击事件


  22. if (e.Button == MouseButtons.Right)


  23. {


  24. ExitCutImage(!this.lbl_CutImage.Visible);


  25. }


  26. 36.}

    ///


    /// 截图窗口鼠标按下事件处理程序
    ///

    ///
    ///
    private void Form1_MouseDown(object sender, MouseEventArgs e)
    {
    // 左键单击事件
    if (e.Button == MouseButtons.Left && e.Clicks == 1)
    {
    if (!this.lbl_CutImage.Visible)
    {
    this.isCuting = true;
    this.beginPoint = e.Location;
    this.endPoint = e.Location;
    SaveCutImageSize(e.Location, e.Location);
    UpdateCutInfoLabel(UpdateUIMode.ShowCutImage | UpdateUIMode.ShowInfoBox);
    }
    }
    // 左键双击事件
    if (e.Button == MouseButtons.Left && e.Clicks == 2)
    {
    if (this.lbl_CutImage.Visible)
    {
    ExecCutImage(false, false);
    }
    }
    // 右键单击事件
    if (e.Button == MouseButtons.Right)
    {
    ExitCutImage(!this.lbl_CutImage.Visible);
    }
    }

    主窗口鼠标移动事件处理程序


[csharp] view plaincopyprint?01.///

02./// 截图窗口鼠标移动事件处理程序
03.///
04.///

05.///

06.private void Form1_MouseMove(object sender, MouseEventArgs e)
07.{


  1. // 如果截取区域不可见,则退出处理过程

  2. if (!this.lbl_CutImage.Visible)

  3. {

  4. UpdateCutInfoLabel(UpdateUIMode.None);


  5. return;


  6. }


  7. Point pntBgn = this.beginPoint;

  8. Point pntEnd = e.Location;


  9. // 如果是反向拖动,重新设置起始点

  10. if (e.Location.X
  11. {

  12. pntBgn = e.Location;


  13. pntEnd = this.beginPoint;


  14. }

  15. else

  16. {

  17. if (e.Location.X


  18. {


  19. pntBgn = new Point(e.Location.X, this.beginPoint.Y);


  20. pntEnd = new Point(this.beginPoint.X, e.Location.Y);


  21. }


  22. else


  23. {


  24. if (e.Location.Y


  25. {


  26. pntBgn = new Point(this.beginPoint.X, e.Location.Y);


  27. pntEnd = new Point(e.Location.X, this.beginPoint.Y);


  28. }


  29. }


  30. }


  31. if (this.isCuting)

  32. {

  33. SaveCutImageSize(pntBgn, pntEnd);


  34. }


  35. UpdateCutInfoLabel(UpdateUIMode.None);
    47.}

    ///


    /// 截图窗口鼠标移动事件处理程序
    ///

    ///
    ///
    private void Form1_MouseMove(object sender, MouseEventArgs e)
    {
    // 如果截取区域不可见,则退出处理过程
    if (!this.lbl_CutImage.Visible)
    {
    UpdateCutInfoLabel(UpdateUIMode.None);
    return;
    }
    Point pntBgn = this.beginPoint;
    Point pntEnd = e.Location;
    // 如果是反向拖动,重新设置起始点
    if (e.Location.X {
    pntBgn = e.Location;
    pntEnd = this.beginPoint;
    }
    else
    {
    if (e.Location.X {
    pntBgn = new Point(e.Location.X, this.beginPoint.Y);
    pntEnd = new Point(this.beginPoint.X, e.Location.Y);
    }
    else
    {
    if (e.Location.Y {
    pntBgn = new Point(this.beginPoint.X, e.Location.Y);
    pntEnd = new Point(e.Location.X, this.beginPoint.Y);
    }
    }
    }
    if (this.isCuting)
    {
    SaveCutImageSize(pntBgn, pntEnd);
    }
    UpdateCutInfoLabel(UpdateUIMode.None);
    }

主窗口鼠标抬起事件处理程序
[csharp] view plaincopyprint?01.///

02./// 截图窗口鼠标抬起事件处理程序
03.///
04.///

05.///

06.private void Form1_MouseUp(object sender, MouseEventArgs e)
07.{


  1. if (e.Button == MouseButtons.Left)

  2. {

  3. if (this.isCuting)


  4. {


  5. this.isCuting = false;


  6. UpdateCutInfoLabel(UpdateUIMode.None);


  7. }


  8. }
    17.}

    ///


    /// 截图窗口鼠标抬起事件处理程序
    ///

    ///
    ///
    private void Form1_MouseUp(object sender, MouseEventArgs e)
    {
    if (e.Button == MouseButtons.Left)
    {
    if (this.isCuting)
    {
    this.isCuting = false;
    UpdateCutInfoLabel(UpdateUIMode.None);
    }
    }
    }
    截取区域图片绘制
    [csharp] view plaincopyprint?01.///
    02./// 截取区域图片的绘制事件处理程序
    03.///
    04.///

    05.///

    06.private void lbl_CutImage_Paint(object sender, PaintEventArgs e)
    07.{


  9. int imgWidth = this.lbl_CutImage.Width - 4;

  10. int imgHeight = this.lbl_CutImage.Height - 4;

  11. if (imgWidth <1) { imgWidth = 1; }

  12. if (imgHeight <1) { imgHeight = 1; }


  13. // 创建缓存图像,先将要绘制的内容全部绘制到缓存中,最后再一次性绘制到 Label 上,

  14. // 这样可以提高性能,并且可以防止屏幕闪烁的问题

  15. Bitmap bmp_lbl = new Bitmap(this.lbl_CutImage.Width, this.lbl_CutImage.Height);

  16. Graphics g = Graphics.FromImage(bmp_lbl);


  17. // 将要截取的部分绘制到缓存

  18. Rectangle destRect = new Rectangle(2, 2, imgWidth, imgHeight);

  19. Point srcPoint = this.lbl_CutImage.Location;

  20. srcPoint.Offset(2, 2);

  21. Rectangle srcRect = new Rectangle(srcPoint, new System.Drawing.Size(imgWidth, imgHeight));

  22. g.DrawImage(this.screenImage, destRect, srcRect, GraphicsUnit.Pixel);


  23. SolidBrush brush = new SolidBrush(Color.FromArgb(10, 124, 202));

  24. Pen pen = new Pen(brush, 1.0F);


  25. //以下部分(边框和调整块)的绘制放在(编辑内容)的后面,是解决绘制编辑内容会覆盖(边框和调整块)的问题


  26. // 绘制边框外的区域,解决会被编辑内容覆盖的问题

  27. // 上边

  28. destRect = new Rectangle(0, 0, this.lbl_CutImage.Width, 2);

  29. srcPoint = this.lbl_CutImage.Location;

  30. //srcPoint.Offset(2, 2);

  31. srcRect = new Rectangle(srcPoint, new System.Drawing.Size(this.lbl_CutImage.Width, 2));

  32. g.DrawImage(this.BackgroundImage, destRect, srcRect, GraphicsUnit.Pixel);


  33. // 下边

  34. destRect = new Rectangle(0, this.lbl_CutImage.Height - 2, this.lbl_CutImage.Width, 2);

  35. srcPoint = this.lbl_CutImage.Location;

  36. srcPoint.Offset(0, this.lbl_CutImage.Height - 2);

  37. srcRect = new Rectangle(srcPoint, new System.Drawing.Size(this.lbl_CutImage.Width, 2));

  38. g.DrawImage(this.BackgroundImage, destRect, srcRect, GraphicsUnit.Pixel);


  39. // 左边

  40. destRect = new Rectangle(0, 2, 2, this.lbl_CutImage.Height - 4);

  41. srcPoint = this.lbl_CutImage.Location;

  42. srcPoint.Offset(0, 2);

  43. srcRect = new Rectangle(srcPoint, new System.Drawing.Size(2, this.lbl_CutImage.Height - 4));

  44. g.DrawImage(this.BackgroundImage, destRect, srcRect, GraphicsUnit.Pixel);


  45. // 右边

  46. destRect = new Rectangle(this.lbl_CutImage.Width - 2, 2, 2, this.lbl_CutImage.Height - 4);

  47. srcPoint = this.lbl_CutImage.Location;

  48. srcPoint.Offset(this.lbl_CutImage.Width - 2, 2);

  49. srcRect = new Rectangle(srcPoint, new System.Drawing.Size(2, this.lbl_CutImage.Height - 4));

  50. g.DrawImage(this.BackgroundImage, destRect, srcRect, GraphicsUnit.Pixel);


  51. // 绘制边框

  52. g.DrawLine(pen, 2, 2, this.lbl_CutImage.Width - 3, 2);

  53. g.DrawLine(pen, 2, 2, 2, this.lbl_CutImage.Height - 3);

  54. g.DrawLine(pen, this.lbl_CutImage.Width - 3, 2, this.lbl_CutImage.Width - 3, this.lbl_CutImage.Height - 3);

  55. g.DrawLine(pen, 2, this.lbl_CutImage.Height - 3, this.lbl_CutImage.Width - 3, this.lbl_CutImage.Height - 3);


  56. // 绘制四个角的调整块

  57. g.FillRectangle(brush, 0, 0, 4, 5);

  58. g.FillRectangle(brush, this.lbl_CutImage.Width - 4, 0, 4, 5);

  59. g.FillRectangle(brush, 0, this.lbl_CutImage.Height - 5, 4, 5);

  60. g.FillRectangle(brush, this.lbl_CutImage.Width - 4, this.lbl_CutImage.Height - 5, 4, 5);


  61. // 绘制中间的四个调整块

  62. int blockX = this.lbl_CutImage.Width / 2 - 2;

  63. int blockY = this.lbl_CutImage.Height / 2 - 2;

  64. g.FillRectangle(brush, blockX, 0, 4, 5);

  65. g.FillRectangle(brush, 0, blockY, 4, 5);

  66. g.FillRectangle(brush, blockX, this.lbl_CutImage.Height - 5, 4, 5);

  67. g.FillRectangle(brush, this.lbl_CutImage.Width - 4, blockY, 4, 5);


  68. // 绘制到 Label 上

  69. e.Graphics.DrawImage(bmp_lbl, 0, 0);

  70. bmp_lbl.Dispose();
    82.}

    ///


    /// 截取区域图片的绘制事件处理程序
    ///

    ///
    ///
    private void lbl_CutImage_Paint(object sender, PaintEventArgs e)
    {
    int imgWidth = this.lbl_CutImage.Width - 4;
    int imgHeight = this.lbl_CutImage.Height - 4;
    if (imgWidth <1) { imgWidth = 1; }
    if (imgHeight <1) { imgHeight = 1; }
    // 创建缓存图像,先将要绘制的内容全部绘制到缓存中,最后再一次性绘制到 Label 上,
    // 这样可以提高性能,并且可以防止屏幕闪烁的问题
    Bitmap bmp_lbl = new Bitmap(this.lbl_CutImage.Width, this.lbl_CutImage.Height);
    Graphics g = Graphics.FromImage(bmp_lbl);
    // 将要截取的部分绘制到缓存
    Rectangle destRect = new Rectangle(2, 2, imgWidth, imgHeight);
    Point srcPoint = this.lbl_CutImage.Location;
    srcPoint.Offset(2, 2);
    Rectangle srcRect = new Rectangle(srcPoint, new System.Drawing.Size(imgWidth, imgHeight));
    g.DrawImage(this.screenImage, destRect, srcRect, GraphicsUnit.Pixel);
    SolidBrush brush = new SolidBrush(Color.FromArgb(10, 124, 202));
    Pen pen = new Pen(brush, 1.0F);
    //以下部分(边框和调整块)的绘制放在(编辑内容)的后面,是解决绘制编辑内容会覆盖(边框和调整块)的问题
    // 绘制边框外的区域,解决会被编辑内容覆盖的问题
    // 上边
    destRect = new Rectangle(0, 0, this.lbl_CutImage.Width, 2);
    srcPoint = this.lbl_CutImage.Location;
    //srcPoint.Offset(2, 2);
    srcRect = new Rectangle(srcPoint, new System.Drawing.Size(this.lbl_CutImage.Width, 2));
    g.DrawImage(this.BackgroundImage, destRect, srcRect, GraphicsUnit.Pixel);
    // 下边
    destRect = new Rectangle(0, this.lbl_CutImage.Height - 2, this.lbl_CutImage.Width, 2);
    srcPoint = this.lbl_CutImage.Location;
    srcPoint.Offset(0, this.lbl_CutImage.Height - 2);
    srcRect = new Rectangle(srcPoint, new System.Drawing.Size(this.lbl_CutImage.Width, 2));
    g.DrawImage(this.BackgroundImage, destRect, srcRect, GraphicsUnit.Pixel);
    // 左边
    destRect = new Rectangle(0, 2, 2, this.lbl_CutImage.Height - 4);
    srcPoint = this.lbl_CutImage.Location;
    srcPoint.Offset(0, 2);
    srcRect = new Rectangle(srcPoint, new System.Drawing.Size(2, this.lbl_CutImage.Height - 4));
    g.DrawImage(this.BackgroundImage, destRect, srcRect, GraphicsUnit.Pixel);
    // 右边
    destRect = new Rectangle(this.lbl_CutImage.Width - 2, 2, 2, this.lbl_CutImage.Height - 4);
    srcPoint = this.lbl_CutImage.Location;
    srcPoint.Offset(this.lbl_CutImage.Width - 2, 2);
    srcRect = new Rectangle(srcPoint, new System.Drawing.Size(2, this.lbl_CutImage.Height - 4));
    g.DrawImage(this.BackgroundImage, destRect, srcRect, GraphicsUnit.Pixel);
    // 绘制边框
    g.DrawLine(pen, 2, 2, this.lbl_CutImage.Width - 3, 2);
    g.DrawLine(pen, 2, 2, 2, this.lbl_CutImage.Height - 3);
    g.DrawLine(pen, this.lbl_CutImage.Width - 3, 2, this.lbl_CutImage.Width - 3, this.lbl_CutImage.Height - 3);
    g.DrawLine(pen, 2, this.lbl_CutImage.Height - 3, this.lbl_CutImage.Width - 3, this.lbl_CutImage.Height - 3);
    // 绘制四个角的调整块
    g.FillRectangle(brush, 0, 0, 4, 5);
    g.FillRectangle(brush, this.lbl_CutImage.Width - 4, 0, 4, 5);
    g.FillRectangle(brush, 0, this.lbl_CutImage.Height - 5, 4, 5);
    g.FillRectangle(brush, this.lbl_CutImage.Width - 4, this.lbl_CutImage.Height - 5, 4, 5);
    // 绘制中间的四个调整块
    int blockX = this.lbl_CutImage.Width / 2 - 2;
    int blockY = this.lbl_CutImage.Height / 2 - 2;
    g.FillRectangle(brush, blockX, 0, 4, 5);
    g.FillRectangle(brush, 0, blockY, 4, 5);
    g.FillRectangle(brush, blockX, this.lbl_CutImage.Height - 5, 4, 5);
    g.FillRectangle(brush, this.lbl_CutImage.Width - 4, blockY, 4, 5);
    // 绘制到 Label 上
    e.Graphics.DrawImage(bmp_lbl, 0, 0);
    bmp_lbl.Dispose();
    }
    双击鼠标左键完成截图功能

[csharp] view plaincopyprint?01.///

02./// 截取区域图片的鼠标按下事件处理程序
03.///
04.///

05.///

06.private void lbl_CutImage_MouseDown(object sender, MouseEventArgs e)
07.{


  1. // 左键双击事件

  2. if (e.Button == MouseButtons.Left && e.Clicks == 2)

  3. {

  4. if (this.lbl_CutImage.Visible)


  5. {


  6. ExecCutImage(false, false);


  7. }


  8. }
    16.}

    ///


    /// 截取区域图片的鼠标按下事件处理程序
    ///

    ///
    ///
    private void lbl_CutImage_MouseDown(object sender, MouseEventArgs e)
    {
    // 左键双击事件
    if (e.Button == MouseButtons.Left && e.Clicks == 2)
    {
    if (this.lbl_CutImage.Visible)
    {
    ExecCutImage(false, false);
    }
    }
    }
    注意:代码都贴完了,别忘了为窗体或组件绑定事件处理程序;

例如:截取区域图片的鼠标按下事件处理程序“lbl_CutImage_MouseDown”,就是“lbl_CutImage”组件的“MouseDown”事件的处理程序,绑定方法参考下图:

技术分享

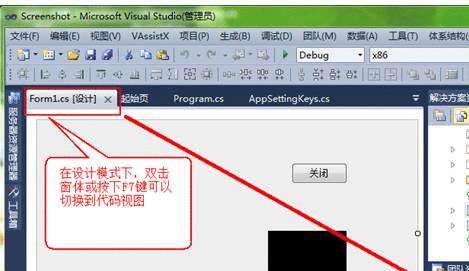
到此,基本截图的功能实现已经实现,至此可以编译一下,检查源代码是否有错误。
end


推荐阅读
  • 基于layUI的图片上传前预览功能的2种实现方式
    本文介绍了基于layUI的图片上传前预览功能的两种实现方式:一种是使用blob+FileReader,另一种是使用layUI自带的参数。通过选择文件后点击文件名,在页面中间弹窗内预览图片。其中,layUI自带的参数实现了图片预览功能。该功能依赖于layUI的上传模块,并使用了blob和FileReader来读取本地文件并获取图像的base64编码。点击文件名时会执行See()函数。摘要长度为169字。 ... [详细]
  • HDU 2372 El Dorado(DP)的最长上升子序列长度求解方法
    本文介绍了解决HDU 2372 El Dorado问题的一种动态规划方法,通过循环k的方式求解最长上升子序列的长度。具体实现过程包括初始化dp数组、读取数列、计算最长上升子序列长度等步骤。 ... [详细]
  • 本文介绍了C#中数据集DataSet对象的使用及相关方法详解,包括DataSet对象的概述、与数据关系对象的互联、Rows集合和Columns集合的组成,以及DataSet对象常用的方法之一——Merge方法的使用。通过本文的阅读,读者可以了解到DataSet对象在C#中的重要性和使用方法。 ... [详细]
  • 本文介绍了OC学习笔记中的@property和@synthesize,包括属性的定义和合成的使用方法。通过示例代码详细讲解了@property和@synthesize的作用和用法。 ... [详细]
  • 本文讨论了在手机移动端如何使用HTML5和JavaScript实现视频上传并压缩视频质量,或者降低手机摄像头拍摄质量的问题。作者指出HTML5和JavaScript无法直接压缩视频,只能通过将视频传送到服务器端由后端进行压缩。对于控制相机拍摄质量,只有使用JAVA编写Android客户端才能实现压缩。此外,作者还解释了在交作业时使用zip格式压缩包导致CSS文件和图片音乐丢失的原因,并提供了解决方法。最后,作者还介绍了一个用于处理图片的类,可以实现图片剪裁处理和生成缩略图的功能。 ... [详细]
  • 导出功能protectedvoidbtnExport(objectsender,EventArgse){用来打开下载窗口stringfileName中 ... [详细]
  • 本文介绍了lua语言中闭包的特性及其在模式匹配、日期处理、编译和模块化等方面的应用。lua中的闭包是严格遵循词法定界的第一类值,函数可以作为变量自由传递,也可以作为参数传递给其他函数。这些特性使得lua语言具有极大的灵活性,为程序开发带来了便利。 ... [详细]
  • PHP图片截取方法及应用实例
    本文介绍了使用PHP动态切割JPEG图片的方法,并提供了应用实例,包括截取视频图、提取文章内容中的图片地址、裁切图片等问题。详细介绍了相关的PHP函数和参数的使用,以及图片切割的具体步骤。同时,还提供了一些注意事项和优化建议。通过本文的学习,读者可以掌握PHP图片截取的技巧,实现自己的需求。 ... [详细]
  • Webpack5内置处理图片资源的配置方法
    本文介绍了在Webpack5中处理图片资源的配置方法。在Webpack4中,我们需要使用file-loader和url-loader来处理图片资源,但是在Webpack5中,这两个Loader的功能已经被内置到Webpack中,我们只需要简单配置即可实现图片资源的处理。本文还介绍了一些常用的配置方法,如匹配不同类型的图片文件、设置输出路径等。通过本文的学习,读者可以快速掌握Webpack5处理图片资源的方法。 ... [详细]
  • FeatureRequestIsyourfeaturerequestrelatedtoaproblem?Please ... [详细]
  • Html5-Canvas实现简易的抽奖转盘效果
    本文介绍了如何使用Html5和Canvas标签来实现简易的抽奖转盘效果,同时使用了jQueryRotate.js旋转插件。文章中给出了主要的html和css代码,并展示了实现的基本效果。 ... [详细]
  • C# WPF自定义按钮的方法
    本文介绍了在C# WPF中实现自定义按钮的方法,包括使用图片作为按钮背景、自定义鼠标进入效果、自定义按压效果和自定义禁用效果。通过创建CustomButton.cs类和ButtonStyles.xaml资源文件,设计按钮的Style并添加所需的依赖属性,可以实现自定义按钮的效果。示例代码在ButtonStyles.xaml中给出。 ... [详细]
  • 图像因存在错误而无法显示 ... [详细]
  • 本文是关于C#类型系统、值类型和引用类型的概念性笔记。介绍了C#1系统类型的三个特性,静态类型的含义,显式类型和隐式类型的区别。还讨论了类、结构、数组类型、枚举、委托类型和接口类型属于哪一种类型。同时纠正了关于结构、引用类型和对象传递的错误表述。最后提到了C#4中使用动态类型的关键字。 ... [详细]
  • HTML5网页模板怎么加百度统计?
    本文介绍了如何在HTML5网页模板中加入百度统计,并对模板文件、css样式表、js插件库等内容进行了说明。同时还解答了关于HTML5网页模板的使用方法、表单提交、域名和空间的问题,并介绍了如何使用Visual Studio 2010创建HTML5模板。此外,还提到了使用Jquery编写美好的HTML5前端框架模板的方法,以及制作企业HTML5网站模板和支持HTML5的CMS。 ... [详细]
author-avatar
huanghxn
这个家伙很懒,什么也没留下!
PHP1.CN | 中国最专业的PHP中文社区 | DevBox开发工具箱 | json解析格式化 |PHP资讯 | PHP教程 | 数据库技术 | 服务器技术 | 前端开发技术 | PHP框架 | 开发工具 | 在线工具
Copyright © 1998 - 2020 PHP1.CN. All Rights Reserved | 京公网安备 11010802041100号 | 京ICP备19059560号-4 | PHP1.CN 第一PHP社区 版权所有