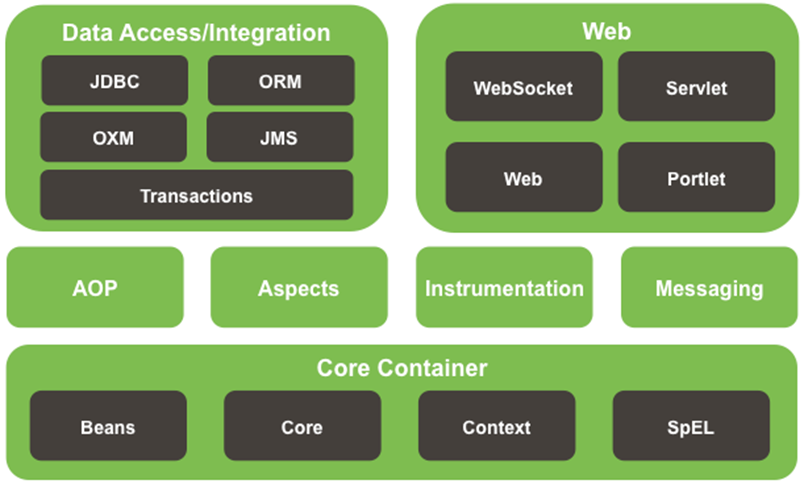
热门标签 | HotTags
当前位置:  开发笔记 > 编程语言 > 正文

spring01环境搭建、控制反转、依赖注入、springIOC和DI实现MVC模式

一、spring环境搭建1、所需jar包:aspectjrt.jaraspectjweaver.jarcglib-


一、spring环境搭建


      1、 所需jar包:
            aspectjrt.jar
            aspectjweaver.jar
            cglib-nodep-2.1_3.jar
            commons-logging.jar
            spring.jar


      2、 配置文件:
            applicationContext.xml
            ********************************************************************************
           
                          xmlns:xsi="http://www.w3.org/2001/XMLSchema-instance"
              xmlns:cOntext="http://www.springframework.org/schema/context"
              xmlns:aop="http://www.springframework.org/schema/aop"
              xmlns:tx="http://www.springframework.org/schema/tx"
              xsi:schemaLocation="http://www.springframework.org/schema/beans
                        http://www.springframework.org/schema/beans/spring-beans-2.5.xsd
                        http://www.springframework.org/schema/context
                        http://www.springframework.org/schema/context/spring-context-2.5.xsd
                        http://www.springframework.org/schema/aop
                        http://www.springframework.org/schema/aop/spring-aop-2.5.xsd
                        http://www.springframework.org/schema/tx
                        http://www.springframework.org/schema/tx/spring-tx-2.5.xsd">


            ********************************************************************************


二、 入门案例
      
      1、类
        ------------------------------------------------------------------------------------
          public class HelloWorld {
            public void hello(){
              System.out.println("hello world~");
            }            
          }        
        ------------------------------------------------------------------------------------
      
      2、配置文件
        ------------------------------------------------------------------------------------


        ------------------------------------------------------------------------------------


      3、测试类
        ------------------------------------------------------------------------------------
          public class CreateObjectTest {
              @Test
              public void testCreateObject(){
                  // 1. 启动spring容器     注: applicationContext.xml在src下                                               
                  ApplicationContext cOntext= new ClassPathXmlApplicationContext("applicationContext.xml");
                  // 2. 从spring容器中把对象取出来,也可以使用别名来获取
                  //HelloWorld helloWorld = (HelloWorld) context.getBean("helloWorld");
                  HelloWorld helloWorld = (HelloWorld) context.getBean("别名例子");
                  // 3. 对象调用方法
                  helloWorld.hello();
              }            
          }     
        ------------------------------------------------------------------------------------


三、 控制反转


      1、 作用: 把对象的创建、初始化、销毁等工作交给spring容器来做,由spring容器控制对象的生命周期。
      
      2、 spring配置文件中,只要是一个bean就会为该bean创建对象
      
      3、 spring容器创建对象的方式
              方式一: 默认是调用默认的构造函数
                     例:
                     *****************************************************************************
                      类:
                         public class HelloWorld {
                              public HelloWorld(){
                                System.out.println("spring默认构造函数创建对象");
                              }                       
                              public void hello(){
                                System.out.println("hello world");
                              }                      
                          }
                      
                      配置文件:


                      测试:
                          @Test
                          public void testCreateMethdo_DefaultConstructor(){                                             
                            ApplicationContext cOntext= new ClassPathXmlApplicationContext("applicationContext.xml");
                            HelloWorld helloWorld = (HelloWorld) context.getBean("helloWorld_C_M");
                            helloWorld.hello();
                          }
                     
                     
                     *****************************************************************************


              方式二: 利用静态工厂方法创建
                        spring调用工厂方法产生对象,但是真正创建对象还是由程序员来完成的
                        
                     例:
                     *****************************************************************************
                      类:
                        public class HelloWorldFactory {
                          public static HelloWorld getInstance(){
                            return new HelloWorld();
                          }                        
                        }
                        
                      配置文件:
                       
                                                      factory-method="getInstance">
                      
                      测试:
                        @Test
                      public void testCreateMethdo_Factory(){                                          
                        ApplicationContext cOntext= new ClassPathXmlApplicationContext("applicationContext.xml");
                        HelloWorld helloWorld = (HelloWorld) context.getBean("helloFactory");
                        helloWorld.hello();
                      }       
                     
                     *****************************************************************************
              
              方式三: 实例工厂方法
                    
                    注: 了解即可,配置文件中为:


      4、 spring容器创建对象的时机
              注: 验证是否为单例,只需获取俩次bean对象,判断其hashcode是否相同即可
              1.在单例的情况下(默认为单例)
                   1、在默认的情况下,启动spring容器创建对象
                   2、在spring的配置文件bean中有一个属性lazy-init="default/true/false"
                         1、如果lazy-init为"default/false"在启动spring容器时创建对象
                         2、如果lazy-init为"true",在context.getBean时才要创建对象
                     意义:
                          在第一种情况下可以在启动spring容器的时候,检查spring容器配置文件的正确性,如果再结合tomcat,
                          如果spring容器不能正常启动,整个tomcat就不能正常启动。但是这样的缺点是把一些bean过早的放在了
                          内存中,如果有数据,则对内存来是一个消耗
                          在第二种情况下,可以减少内存的消耗,但是不容易发现错误
              2.在多例的情况下
                    就是一种情况:在context.getBean时才创建对象
                  
                  
      5、 spring的bean中的scope
              1、由spring产生的bean默认是单例的
              2、可以在spring的配置文件中,scope的值进行修改="singleton/prototype/request/session/global session"
              3、如果spring的配置文件的scope为"prototype",则在得到该bean时才创建对象
              
              
      6、 spring容器对象的生命周期
              1、spring容器创建对象
              2、执行init方法
              3、调用自己的方法
              4、当spring容器关闭的时候执行destroy方法
              注:当scope为"prototype"时,spring容器就不再调用destroy方法
              例:
                --------------------------------------------------------------------------
                类:
                    public class HelloWorld {
                        public HelloWorld(){
                          System.out.println("被创建");
                        }                      
                        public void init(){
                          System.out.println("init");
                        }                      
                        public void hello(){
                          System.out.println("hello world~");
                        }
                        public void destroy(){
                          System.out.println("destroy");
                        }                     
                    }
                 
                 配置文件:
                                              init-method="init" destroy-method="destroy" scope="prototype">
                          
                 测试:
                    @Test
                    public void testInitDestroy(){
                      ApplicationContext cOntext= new ClassPathXmlApplicationContext("applicationContext.xml");
                      HelloWorld helloWorld = (HelloWorld) context.getBean("helloInitDestroy");
                      helloWorld.hello();
                      
                      // 注: 必须转换为ClassPathXmlApplicationContext,才可以调用close方法
                      ClassPathXmlApplicationContext applicatiOnContext= (ClassPathXmlApplicationContext) context;
                      applicationContext.close();
                    }
                --------------------------------------------------------------------------


四、 spring的DI: 依赖注入


      1、 作用: 给属性赋值
      
      2、 方式一:  利用set方式给属性赋值
                  一个类中的属性都可以采用springDI的方式进行赋值,但是并不是所有的属性都适合赋值
                  property是用来描述一个类的属性
                          基本类型的封装类、String等需要值的类型用value赋值;引用类型用ref赋值
                  例子:
                  ---------------------------------------------------------------------------------------
                  类:
                      public class Person {
                        private Long pid;
                        private String pname;
                        private Student student;
                        private Set sets;
                        private List lists;
                        private Map map;
                        private Properties properties;
                        // set/get属性
                      }
                   
                      public class Student {}
                      
                   配置文件:


                                  list1
                                 
                                  list2


                                  set1
                                 
                                  set2


                                      map1


                                      prop1


                                      prop2


                  ---------------------------------------------------------------------------------------
        
        
         方式2: 利用构造函数给属性赋值
                1、如果spring的配置文件中的bean中没有该元素,则调用默认的构造函数
                2、如果spring的配置文件中的bean中有该元素,则该元素确定唯一的构造函数
                      index  代表参数的位置  从0开始计算
                      type   指的是参数的类型
                      value  给基本类型赋值
                      ref    给引用类型赋值
                      
                例子:
                  ---------------------------------------------------------------------------------------
                  类:
                      public class Person {
                          private Long pid;
                          private String pname;
                          private Student student;
                          private Set sets;
                          private List lists;
                          private Map map;
                          private Properties properties;


                          public Person(){}                         
                          public Person(String pname, Student student) {
                            super();
                            this.pname = pname;
                            this.student = student;
                          }
                      }
                      
                      public class Student {
                          public void aaa(){
                            System.out.println("student");
                          }                        
                      }
                  
                  配置文件:


                  测试:
                      @Test
                      public void testDIConstructor(){
                          ApplicationContext cOntext= new ClassPathXmlApplicationContext("applicationContext.xml");
                          Person person = (Person) context.getBean("person_con");
                          System.out.println(person.getPname());
                          person.getStudent().aaa();
                      }
                  
                  ---------------------------------------------------------------------------------------


      3、 springIOC和DI的意义:
              实现了完全的面向接口编程,即等号俩边都是借口,可以在配置文件中更改接口的实现方式。
              
              
      4、 利用springIOC和DI实现MVC模式(set方式为例)
            
            例:
                ---------------------------------------------------------------------------------------
                Action层:
                      public class PersonAction {
                        private PersonService personService;
                        public PersonService getPersonService() {
                          return personService;
                        }
                        public void setPersonService(PersonService personService) {
                          this.persOnService= personService;
                        }                 
                        public void savePerson(){
                          this.personService.savePerson();
                        }                  
                      }
                    
                 Service层:
                      public interface PersonService {
                        public void savePerson();
                      }  
                      
                 ServiceImpl层:
                      public class PersonServiceImpl implements PersonService {
                        private PersonDao personDao;                       
                        public PersonDao getPersonDao() {
                          return personDao;
                        }
                        public void setPersonDao(PersonDao personDao) {
                          this.persOnDao= personDao;
                        }
                        public void savePerson() {
                          this.personDao.savePerson();
                        }
                      }
                
                 Dao层:
                      public interface PersonDao {
                        public void savePerson();
                      }
                      
                 DaoImpl层:
                      public class PersonDaoImpl implements PersonDao {
                        public void savePerson() {
                          System.out.println("操作数据库的代码");
                        }
                      }
            
                 配置文件:


                 测试:
                      @Test
                      public void test(){
                        ApplicationContext cOntext= new ClassPathXmlApplicationContext("applicationContext.xml");
                        PersonDao persOnDao= (PersonDao) context.getBean("personDao");
                        personDao.savePerson();
                      }               
                

                ---------------------------------------------------------------------------------------


推荐阅读
  • 标题: ... [详细]
  • SpringMVC接收请求参数的方式总结
    本文总结了在SpringMVC开发中处理控制器参数的各种方式,包括处理使用@RequestParam注解的参数、MultipartFile类型参数和Simple类型参数的RequestParamMethodArgumentResolver,处理@RequestBody注解的参数的RequestResponseBodyMethodProcessor,以及PathVariableMapMethodArgumentResol等子类。 ... [详细]
  • Activiti7流程定义开发笔记
    本文介绍了Activiti7流程定义的开发笔记,包括流程定义的概念、使用activiti-explorer和activiti-eclipse-designer进行建模的方式,以及生成流程图的方法。还介绍了流程定义部署的概念和步骤,包括将bpmn和png文件添加部署到activiti数据库中的方法,以及使用ZIP包进行部署的方式。同时还提到了activiti.cfg.xml文件的作用。 ... [详细]
  • Spring框架《一》简介
    Spring框架《一》1.Spring概述1.1简介1.2Spring模板二、IOC容器和Bean1.IOC和DI简介2.三种通过类型获取bean3.给bean的属性赋值3.1依赖 ... [详细]
  • Spring特性实现接口多类的动态调用详解
    本文详细介绍了如何使用Spring特性实现接口多类的动态调用。通过对Spring IoC容器的基础类BeanFactory和ApplicationContext的介绍,以及getBeansOfType方法的应用,解决了在实际工作中遇到的接口及多个实现类的问题。同时,文章还提到了SPI使用的不便之处,并介绍了借助ApplicationContext实现需求的方法。阅读本文,你将了解到Spring特性的实现原理和实际应用方式。 ... [详细]
  • springmvc学习笔记(十):控制器业务方法中通过注解实现封装Javabean接收表单提交的数据
    本文介绍了在springmvc学习笔记系列的第十篇中,控制器的业务方法中如何通过注解实现封装Javabean来接收表单提交的数据。同时还讨论了当有多个注册表单且字段完全相同时,如何将其交给同一个控制器处理。 ... [详细]
  • Spring常用注解(绝对经典),全靠这份Java知识点PDF大全
    本文介绍了Spring常用注解和注入bean的注解,包括@Bean、@Autowired、@Inject等,同时提供了一个Java知识点PDF大全的资源链接。其中详细介绍了ColorFactoryBean的使用,以及@Autowired和@Inject的区别和用法。此外,还提到了@Required属性的配置和使用。 ... [详细]
  • 用Vue实现的Demo商品管理效果图及实现代码
    本文介绍了一个使用Vue实现的Demo商品管理的效果图及实现代码。 ... [详细]
  • SpringMVC工作流程概述
    SpringMVC工作流程概述 ... [详细]
  • t-io 2.0.0发布-法网天眼第一版的回顾和更新说明
    本文回顾了t-io 1.x版本的工程结构和性能数据,并介绍了t-io在码云上的成绩和用户反馈。同时,还提到了@openSeLi同学发布的t-io 30W长连接并发压力测试报告。最后,详细介绍了t-io 2.0.0版本的更新内容,包括更简洁的使用方式和内置的httpsession功能。 ... [详细]
  • 本文讨论了在Spring 3.1中,数据源未能自动连接到@Configuration类的错误原因,并提供了解决方法。作者发现了错误的原因,并在代码中手动定义了PersistenceAnnotationBeanPostProcessor。作者删除了该定义后,问题得到解决。此外,作者还指出了默认的PersistenceAnnotationBeanPostProcessor的注册方式,并提供了自定义该bean定义的方法。 ... [详细]
  • Spring学习(4):Spring管理对象之间的关联关系
    本文是关于Spring学习的第四篇文章,讲述了Spring框架中管理对象之间的关联关系。文章介绍了MessageService类和MessagePrinter类的实现,并解释了它们之间的关联关系。通过学习本文,读者可以了解Spring框架中对象之间的关联关系的概念和实现方式。 ... [详细]
  • 本文介绍了Java的公式汇总及相关知识,包括定义变量的语法格式、类型转换公式、三元表达式、定义新的实例的格式、引用类型的方法以及数组静态初始化等内容。希望对读者有一定的参考价值。 ... [详细]
  • 基于Socket的多个客户端之间的聊天功能实现方法
    本文介绍了基于Socket的多个客户端之间实现聊天功能的方法,包括服务器端的实现和客户端的实现。服务器端通过每个用户的输出流向特定用户发送消息,而客户端通过输入流接收消息。同时,还介绍了相关的实体类和Socket的基本概念。 ... [详细]
  • 本文整理了315道Python基础题目及答案,帮助读者检验学习成果。文章介绍了学习Python的途径、Python与其他编程语言的对比、解释型和编译型编程语言的简述、Python解释器的种类和特点、位和字节的关系、以及至少5个PEP8规范。对于想要检验自己学习成果的读者,这些题目将是一个不错的选择。请注意,答案在视频中,本文不提供答案。 ... [详细]
author-avatar
淡淡笑嘻嘻
这个家伙很懒,什么也没留下!
PHP1.CN | 中国最专业的PHP中文社区 | DevBox开发工具箱 | json解析格式化 |PHP资讯 | PHP教程 | 数据库技术 | 服务器技术 | 前端开发技术 | PHP框架 | 开发工具 | 在线工具
Copyright © 1998 - 2020 PHP1.CN. All Rights Reserved | 京公网安备 11010802041100号 | 京ICP备19059560号-4 | PHP1.CN 第一PHP社区 版权所有