原文:http://www.weiruoyu.cn/?p=724
做之前先搞清楚一个问题。
Tomcat集群 负载均衡和session复制的区别
Tomacat集群 就是配置过个tomcat
负载均衡 就是通过apache配置多个tomcat ,让访问量分布到多个web服务器 上面,减少单个服务器的压力。
session 复制 配置多个tomcat会出现这样的情况,就是某个用户在访问网站的时候,第一次请求请求到服务器1,然而第二次却请求到服务器2,此时改用户的session信息只在服务器1有,到服务器2就丢失了改用户的信息,为了解决这个问题,apache 配置过程中需要将session信息在不同服务器间同步。
按自己的理解写的,水平有限,希望对你有所帮助。
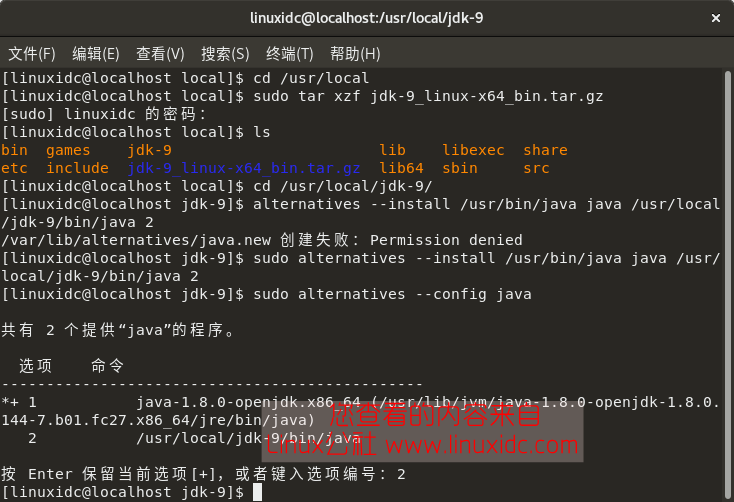
1.安装jdk(tomcat要使用)
1.1#./jdk-6u10-rc-bin-b28-linux-i586-21_jul_2008-rpm.bin
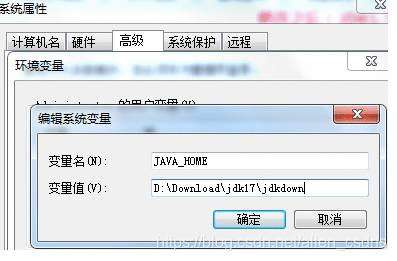
1.2用文本编辑器打开vi /etc/profile,在文件的最后添加以下内容
JAVA_HOME=/usr/java/jdk1.5.0_06
PATH=$JAVA_HOME/bin:$PATH:.
CLASSPATH=.:$JAVA_HOME/lib/dt.jar:$JAVA_HOME/lib/tools.jar
export JAVA_HOME
export PATH
export CLASSPATH
1.3测试:
[root@localhost httpd-2.2.19]# java -version
java version "1.6.0_26"
Java(TM) SE Runtime Environment (build 1.6.0_26-b03)
Java HotSpot(TM) Client VM (build 20.1-b02, mixed mode, sharing)
2.apache的安装
1.解压,进入目录并安装
tar zxf apachehttpd-2.2.19.tar.gz
cd httpd-2.2.19/
./configure --prefix=/usr/local/apache --enable-so --enable-mods-shared="proxy proxy_http proxy_ftp proxy_connect proxy_balancer headers"
make
make install
修改/usr/local/apache/conf/httpd.conf
1.Include conf/extra/httpd-vhosts.conf,去掉前面的注释符
2.最下面添加
ProxyRequests Off
BalancerMember ajp://127.0.0.1:6045 loadfactor=1 route=tomcat_test1
BalancerMember ajp://127.0.0.1:6055 loadfactor=1 route=tomcat_test2
ProxySet lbmethod=byrequests timeout=15
6045对应/usr/local/tomcat/conf/server.xml里面的端口
tomcat_test1要对应里面的
3.修改/usr/local/apache/conf/extra/httpd-vhosts.conf
把
ServerAdmin xy5300@qq.com
ServerName localhost
ServerAlias localhost
ProxyPass / balancer://cluster/ stickysession=jsessionid nofailover=On
ProxyPa***everse / balancer://cluster/
ErrorLog "logs/clustertest-error.log"
CustomLog "logs/clustertest-access.log" common
修改tomcat目录里conf下的server.xml
删除掉
并在原来位置添加
两个tomcat都要修改。
如果两个tomcat在同一台电脑上,就要修改tomcat的三个端口,避免冲突。
关闭端口,连接端口,集群链接端口(
)
完成以上的就制作了负载均衡
如果做session复制,需要在server.xml里的
下面的代码。
剩下参考下面这个:http://c04s31602.iteye.com/blog/112314
<ClusterclassName&#61;"org.apache.catalina.ha.tcp.SimpleTcpCluster"
channelSendOptions&#61;"8">
<ManagerclassName&#61;"org.apache.catalina.ha.session.DeltaManager"
expireSessionsOnShutdown&#61;"false"
notifyListenersOnReplication&#61;"true"/>
<ChannelclassName&#61;"org.apache.catalina.tribes.group.GroupChannel">
<MembershipclassName&#61;"org.apache.catalina.tribes.membership.McastService"
address&#61;"228.0.0.4"
port&#61;"45564"
frequency&#61;"500"
dropTime&#61;"3000"/>
<ReceiverclassName&#61;"org.apache.catalina.tribes.transport.nio.NioReceiver"
address&#61;"auto"
port&#61;"4000"
autoBind&#61;"100"
selectorTimeout&#61;"5000"
maxThreads&#61;"6"/>
<SenderclassName&#61;"org.apache.catalina.tribes.transport.ReplicationTransmitter">
<TransportclassName&#61;"org.apache.catalina.tribes.transport.nio.PooledParallelSender"/>
Sender>
<InterceptorclassName&#61;"org.apache.catalina.tribes.group.interceptors.TcpFailureDetector"/>
<InterceptorclassName&#61;"org.apache.catalina.tribes.group.interceptors.MessageDispatch15Interceptor"/>
Channel>
<ValveclassName&#61;"org.apache.catalina.ha.tcp.ReplicationValve"
filter&#61;""/>
<ValveclassName&#61;"org.apache.catalina.ha.session.JvmRouteBinderValve"/>
<DeployerclassName&#61;"org.apache.catalina.ha.deploy.FarmWarDeployer"
tempDir&#61;"/tmp/war-temp/"
deployDir&#61;"/tmp/war-deploy/"
watchDir&#61;"/tmp/war-listen/"
watchEnabled&#61;"false"/>
<ClusterListenerclassName&#61;"org.apache.catalina.ha.session.JvmRouteSessionIDBinderListener"/>
<ClusterListenerclassName&#61;"org.apache.catalina.ha.session.ClusterSessionListener"/>
Cluster>
注意一下&#xff0c;里面有个part&#61;“4000”&#xff0c;同一台的tomcat下要修改这个端口&#xff0c;否则会有冲突。
在**\cluster\WEB-INF\web.xml中加入
出现如下状态&#xff1a;
测试&#xff1a;
1.在tomcat的webapps创建目录 test&#xff0c;并建立文件 test.jsp&#xff0c;
内容为&#xff1a;
<%
System.out.println("&#61;&#61;&#61;&#61;&#61;&#61;&#61;&#61;&#61;&#61;&#61;&#61;&#61;&#61;&#61;&#61;&#61;&#61;&#61;&#61;&#61;&#61;&#61;&#61;&#61;&#61;&#61;");
%>
2个tomcat都要加上&#xff0c;然后都重启&#xff0c;在地址栏输入
192.168.138.132/test/test.jsp
不停刷新&#xff0c;你会看到上面的图片就是两边的负载均衡已经成功。


测试2
我就参考了喝了点酒的那个哥们的测试脚本&#xff1a;直接复制过来
集群测试
1. tomcat7_a和tomcat7_b的cluster&#xff08;cluster工程是直接复制webapps下的examples改名就可以了&#xff09;工程中分别添加测试文件:testCluster.jsp

<%&#64; page contentType&#61;"text/html; charset&#61;GBK" %>
<%&#64; page import&#61;"java.util.*" %>
<%
//HttpSession session &#61; request.getSession(true);
System.out.println(session.getId());
out.println("
SESSION ID:" &#43; session.getId()&#43;"
");// 如果有新的请求&#xff0c;则添加session属性
String name &#61; request.getParameter("name");
if (name !&#61; null && name.length() > 0) {
String value &#61; request.getParameter("value");
session.setAttribute(name, value);
}
out.print("Session List:");
Enumeration
names &#61; session.getAttributeNames(); while (names.hasMoreElements()) {
String sname &#61; names.nextElement();
String value &#61; session.getAttribute(sname).toString();
out.println( sname &#43; " &#61; " &#43; value&#43;"
");System.out.println( sname &#43; " &#61; " &#43; value);
}
%>
"testCluster.jsp" method&#61;"post">
名称:20 name&#61;"name">
值:20 name&#61;"value">
"提交">
2. 启动tomcat7_a,启动完毕后&#xff0c;启动tomcat7_b
3. 进入http://localhost:8081/cluster/testCluster.jsp 对应tomcat7_a(8081)&#xff0c;登录几次&#xff0c;可看到
4. 另外打开一个浏览器&#xff0c;进入http://localhost:8082/cluster/testCluster.jsp对应tomcat7_b(8082)&#xff0c;登录name:tomcat_b&#xff0c;value:b value可看到
5. 刷新tomcat7_a(8081)


 京公网安备 11010802041100号