作者:迷雾飘渺2702932540 | 来源:互联网 | 2023-06-05 11:05
一、jupyter的安装
1、利用anaconda 创建一个jupyter环境,在jupter环境中安装jupyter。执行一下命令回车:
conda create -n jupyter python=3.6
激活新建的jupter环境
source activate jupyter
安装jupyter
pip install jupyter
二、jupyter远程访问配置(这个环节跟着网上通用的那些配置方法走出了挺多问题)
1、生成配置文件(配置文件默认地址:~/.jupyter/jupyter_notebook_config.py)
如果之前安装过,可能会提示你是否要重置配置文件,推荐不要,例如本机上重置可能会导致jupyter notebook无法正常在浏览器打开(当然也是有办法解决的)由于我使用的是容器所以默认地址为:/root/.jupyter/jupyter_notebook_config.py,
实际上:~/.jupyter/jupyter_notebook_config.py = /root/.jupyter/jupyter_notebook_config.py
生成配置文件命令:
jupyter notebook --generate-config

2、设置自己的Jupyter notebook的登录密码(如果忘记登录密码,可以使用该命令重新设置)
执行设置登录密码命令:
jupyter notebook password
3、生成秘钥(保存好,在配置文件时使用)
执行生成密钥命令:
vim ~/.jupyter/jupyter_notebook_config.json
生成的密钥为:
argon2:$argon2id$v=19$m=10240,t=10,p=8$Cs+Wj+0ngPW33iq88blm6w$jVcEBR3vhP9FOoKZgDZxjg
记下密钥,argon2:argon2idargon2idargon2idv=19m=10240,t=10,p=8m=10240,t=10,p=8m=10240,t=10,p=8Cs+Wj+0ngPW33iq88blm6w$jVcEBR3vhP9FOoKZgDZxjg
3、编辑配置文件
vim ~/.jupyter/jupyter_notebook_config.py
修改以下几项 或者 直接将下面的配置直接复制到配置文件的末尾。
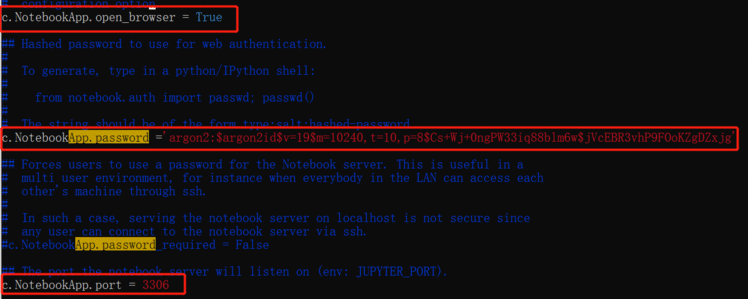
c.NotebookApp.ip='*'
c.NotebookApp.password = argon2:$argon2id$v=19$m=10240,t=10,p=8$Cs+Wj+0ngPW33iq88blm6w$jVcEBR3vhP9FOoKZgDZxjg
c.NotebookApp.open_browser = False
c.NotebookApp.port =3036
c.NotebookApp.allow_remote_access = True
vim查询小技巧
vim进入文件
按i进入插入模式
按esc和: 输入/+要查询内容回车
按n查询结果的下一个,按N查询结果的上一个


4、启动jupter服务
运行Jupyter(–ip指定ip,–no-browser不打开浏览器,–allow-root允许root运行)
jupyter notebook --ip=0.0.0.0 --no-browser --allow-root
三、远程访问
1、本地访问容器中的jupter
在浏览器中输入:
http://127.0.0.1:3306/
或者
http://localhost:3306/
或者
127.0.0.x:3306/
2、公网访问
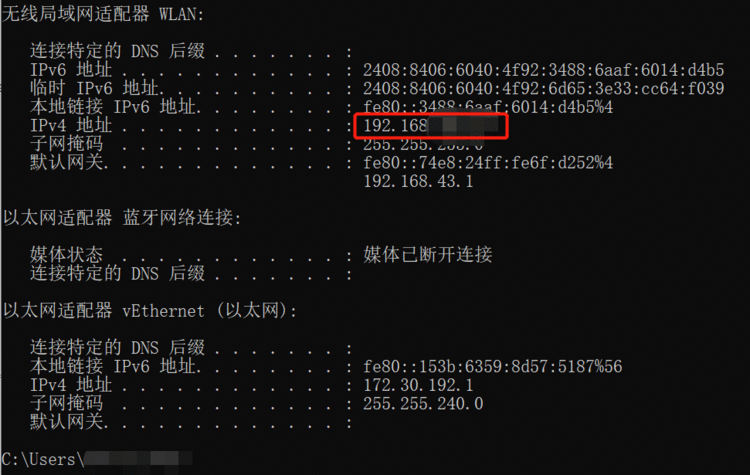
查看宿主机地址:
window+R
cmd
ipconfig
在浏览器中输入:
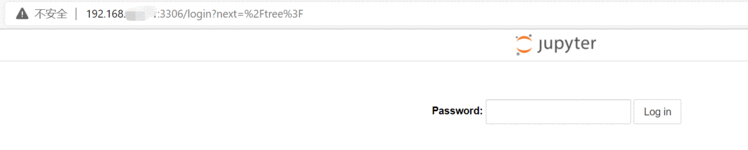
http://192.168.xx.xx:3306/
输入自己设置的登录密码登录,我设置的为123
四、后台运行
直接以 jupyter notebook 命令启动 Jupyter 的方式在连接断开时将会中断,所以我们需要让 Jupyter 服务在后台常驻。
先按下 Ctrl + C 并输入 y 停止 Jupyter 服务,然后执行以下命令:
nohup jupyter notebook > /data/jupyter/jupyter.log 2>&1 &
该命令将使得 Jupyter 在后台运行,并将日志写在 /data/jupyter/jupyter.log 文件中。
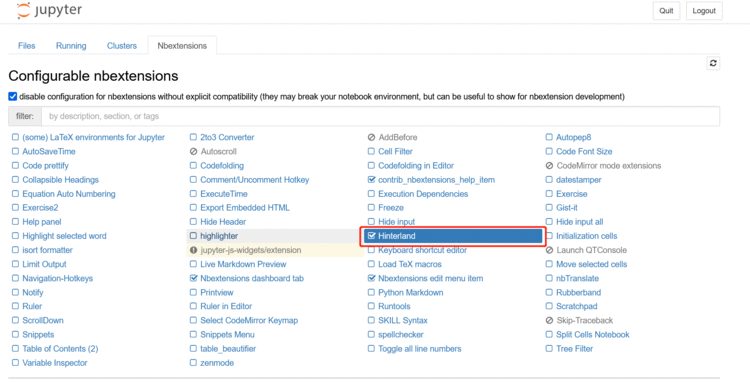
五、jupyter 代码自动补全设置
pip install jupyter_contrib_nbextensions -i https://pypi.tuna.tsinghua.edu.cn/simplejupyter contrib nbextension install --userpip install jupyter_nbextensions_configurator -i https://pypi.tuna.tsinghua.edu.cn/simplejupyter nbextensions_configurator enable --user
jupyter notebook选择conda环境
服务器上配置有多个conda的Python环境,在使用jupyter notebook时需要使用其中的一个环境,但是其默认还是使用系统python环境,因此需要解决这个问题.
解决方案其实很简答,参考这个帖子.
首先,安装nb_conda_kernels包:
conda install nb_conda_kernels
然后在新建notebook时选择相应的环境:
参考:
https://www.jianshu.com/p/5eed417e04ca
jupyer note 后台运行与关闭后台运行
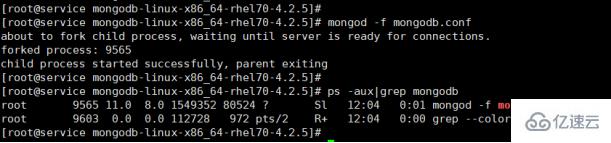
查看jupyter运行的程序
ps -aux | grep jupyter

停止运行该程序
kill -9 PID
kill -9 2856
https://blog.csdn.net/wcj623917753/article/details/121296724
参考文章
https://blog.csdn.net/wwyy2018/article/details/90440088
docker外部无法访问
https://blog.csdn.net/weixin_42182599/article/details/106191732


 京公网安备 11010802041100号