浏览本文须要一点 JS 基本和浏览的耐烦,我特么本身写完后发明这文章咋这么长啊。。。假如你仔细看完算我输!
另我特地做了个 vue-nw-seed 项目,内里包含了我这篇文章里的一切的点和一些别的优化,轻易人人疾速开辟。
vuejs-templates 建构 NW.js 运用在 Vue 圈里,最轻易的项目建构体式格局应该是 vue-cli ,这悉数生态内里最便利的又应该是 webpack 这个模板。再对这个模板比较熟习了后,就最先想能不能依据这个模板疾速构建我们须要的 NW.js 项目呢?
蛤蛤,答案当然是能够的。
最最先的思绪比较笨重,假如你时刻多,能够去看看我之前的思绪 用 vue2 和 webpack 疾速建构 NW.js 项目(1) 2333。在我一连加班一个月后整出了我们 豆豆数学 初版后,轻微有了点余暇时刻,就从新翻看了一下 NW.js 的文档,有点小发明啊。
Manifest Format 清单文件中的小发明
main
{String} which HTML page should be opened or which Javascript file should be executed when NW.js starts.
You can specify a URL here. You can also specify just a filename (such as index.html or script.js) or a path (relative to the directory where your package.json resides).node-remote
{Array} or {String} Enable calling Node in remote pages. The value controls for which sites this feature should be turned on. Each item in the array follows the match patterns used in Chrome extension.
这个意义是说中说 main 字段能够写一个 URL ,也能写 index.html 或许 script.js 文件, node-remote 字段说许可哪些长途页面挪用 Node 要领。
这组合起来就能够完全无侵入的运用 vuejs-templates 建构 NW.js 运用!
团体思绪就是设置 package.json 的 main 字段为 vue 项目的肇端地点,然后把 node-remote 设置为
先上个结果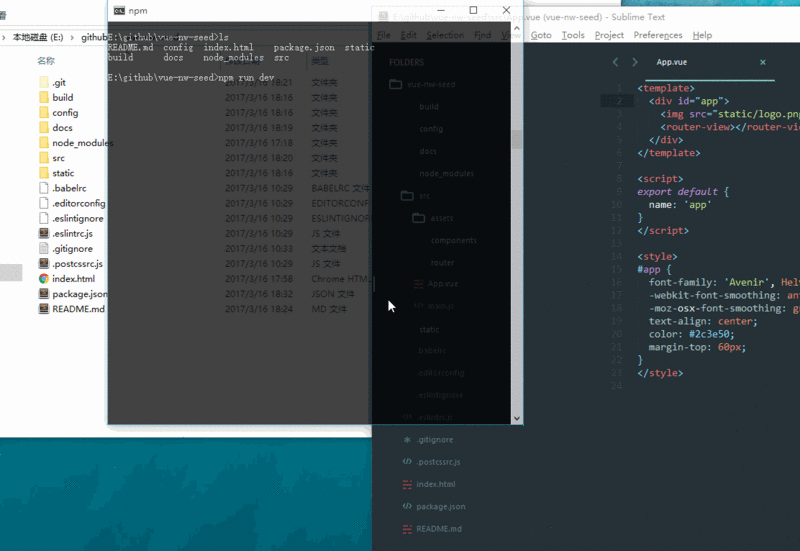
依旧引荐 nwjs/npm-installer
npm install nw --save-dev
收集不要的情况下,请参考之前写的文章中关于 用 npm 装置 NW.js 部份。
相干于初版,此次关于模板标配的建构设置修正相称小。
把 build/webpack.base.conf.js 中新加个 target 字段就搞定。也许就是如许
module.exports = {
  entry: { ... },
  output: { ... },
  target: 'node-webkit',
  ...
}
简朴吧。
package.json增添或许修正 main 字段为你的 vue 项目启动地点,再增添 node-remote 为
{
"name": "vue-nw-seed",
"version": "0.1.0",
// ...
"main": "http://localhost:8080",
"window": {
"title": "vue-nw-seed",
"toolbar": true,
"width": 800,
"height": 500,
"min_width": 800,
"min_height": 500,
"resizable": true,
"frame": true,
"kiosk": false,
"icon": "/static/logo.png",
"show_in_taskbar": true
},
"nodejs": true,
"js-flags": "--harmony",
"node-remote": "
}
npm run dev 翻开浏览器为翻开 NW.js这一部应该是最庞杂的一步,但实际上,相称简朴。
增添 build/dev-nw.js
var exec = require('child_process').exec
var path = require('path')
var fs = require('fs')
var nwPath = require('nw').findpath()
var rootPath = path.resolve(__dirname, '../')
var packageJsOnPath= path.resolve(rootPath, './package.json')
module.exports = runNwDev
function runNwDev(uri = '') {
  if (uri && (uri + '').trim()) {
    tmpJson = require(packageJsonPath)
    tmpJson.main = uri
    fs.writeFileSync(packageJsonPath, JSON.stringify(tmpJson, null, '  '), 'utf-8')
  }
  var closed
  var nwDev = exec(nwPath + ' ' + rootPath, { cwd: rootPath }, function(err, stdout, stderr) {
    process.exit(0)
    closed = true
  })
  nwDev.stdout.on('data', console.log)
  nwDev.stdout.on('error', console.error)
  // 退出时也封闭 NW 历程
  process.on('exit', exitHandle)
  process.on('uncaughtException', exitHandle)
  function exitHandle(e) {
    if (!closed) nwDev.kill()
    console.log(e || '233333, bye~~~')
  }
}
并修正 build/dev-server.js 文件中翻开浏览器的那部份代码。
  // when env is testing, don't need open it
  if (autoOpenBrowser && process.env.NODE_ENV !== 'testing') {
    require('./dev-nw')(uri)
  }
至此,悉数开辟建构就完成了,是否是险些无侵入性。
引荐运用官方的包 nw-builder ,虽然良久都没咋更新过了。。。
团体思绪 :先打包 vue 项目,再用 Node.js 整顿构成一个 package.json 文件到 dist 目次中去。再用 nw-builder 打包出 NW 运用。
先看结果,增添自信心。
npm install nw-builder --save-dev
这个历程仅仅是装置了打包 NW 的包装器,其要用到的 runtime 要在运用的时刻才下载。
假如收集不好。。。能够本身先想个办法直接复制一份 runtime 到 cacheDir 目次中。
设置大于商定,2333。
增添 manifest 要被整顿的字段,终究从 ./package.json 整顿到 ./dist/package.json 中。
增添 builder 字段,能够参照 nw-builder 文档来设置。
// see http://vuejs-templates.github.io/webpack for documentation.
var path = require('path')
function resolve(dir) {
  return path.join(__dirname, '..', dir)
}
module.exports = {
  build: {
    // ...
    nw: {
      // manifest for nw
      // the fileds will merge with `./package.json` and build to `./dist/package.json` for NW.js
      // Manifest Format: http://docs.nwjs.io/en/latest/References/Manifest%20Format/
      manifest: ['name', 'appName', 'version', 'description', 'author', { main: './index.html' }, 'window', 'nodejs', 'js-flags', 'node-remote'],
      // see document: https://github.com/nwjs/nw-builder
      builder: {
        files: [resolve('./dist/**')],
        platforms: ['win32'],
        version: '0.14.7',
        flavor: 'normal',
        cacheDir: resolve('./node_modules/_nw-builder-cache/'),
        buildDir: resolve('./output'),
        zip: true,
        winIco: resolve('./static/favicon.ico'),
        buildType: 'versioned'
      }
    }
  },
  dev: {
    //...
  }
}
./build/build-nw.js 文件这个文件重要做的事变就是整顿出 NW.js 用的 package.json,然后再挪用 nw-builder 举行打包
var exec = require('child_process').exec
var path = require('path')
var fs = require('fs')
var util = require('util')
var rootPath = path.resolve(__dirname, '../')
// get config
var cOnfig= require(path.resolve(rootPath, 'config'))
// `./package.json`
var tmpJson = require(path.resolve(rootPath, './package.json'))
var manifestPath = path.resolve(config.build.assetsRoot, './package.json')
// manifest for `./dist/package.json`
var manifest = {}
config.build.nw.manifest.forEach(function(v, i) {
  if (util.isString(v)) manifest[v] = tmpJson[v]
  else if (util.isObject(v)) manifest = util._extend(manifest, v)
})
fs.writeFile(manifestPath, JSON.stringify(manifest, null, '  '), 'utf-8', function(err, data) {
  if (err) throw err
  // start build app
  if (!config.build.nw.builder) return
  var NwBuilder = require('nw-builder')
  var nw = new NwBuilder(config.build.nw.builder)
  nw.build(function(err, data) {
    if (err) console.log(err)
    console.log('build nw done!')
  })
})
./build/build.js 中增添打包进口增添下面这一行代码在 webpack 打包完成的回调中
    // start build nw.js app
    require('./build-nw.js')
简朴 4 部就完成了打包,是否是非常清楚和简朴。蛤
这个部份,我之前也写了一篇文章 打包NW.js运用和制造windows装置文件 内里有比较细致的打包引见。
但,在我们借助了 nw-builder 做了 NW 的打包后,仅仅打装置包就比较简朴了,所以本日我就简写,勤俭人人的时刻和性命。
重要思绪:用 Node.js 操纵 iss 文件,再借助官方引荐的 innosetup 举行打包。
继承录一个 打包 exe 文件的 demo
npm install iconv-lite innosetup-compiler --save-dev
./config/setup.iss 打包设置文件踩坑注重,不要用 utf8 存这个文件,用 ansi 花样存这个设置文件, 不然打出来的装置包是乱码。
; Script generated by the Inno Setup Script Wizard.
; SEE THE DOCUMENTATION FOR DETAILS ON CREATING INNO SETUP SCRIPT FILES!
; This CWD is the directory where the `setup.iss`, pay attention to join the relative directory!
; 该实行目次为 `setup.iss` 地点的目次,请注重拼接相对目次
#define MyAppName "_name_"
#define MyAppAliasName "_appName_"
#define MyAppVersion "_version_"
#define MyAppPublisher "_appPublisher_"
#define MyAppURL "_appURL_"
#define MyAppExeName "_name_.exe"
#define OutputPath "_outputPath_"
#define OutputFileName "_outputFileName_"
#define SourceMain "_filesPath_\_name_.exe"
#define SourceFolder "_filesPath_\*"
#define LicenseFilePath "_resourcesPath_\license.txt"
#define SetupIconFilePath "_resourcesPath_\logo.ico"
#define MyAppId "_appId_"
[Setup]
; NOTE: The value of AppId uniquely identifies this application.
; Do not use the same AppId value in installers for other applications.
; (To generate a new GUID, click Tools | Generate GUID inside the IDE.)
AppId={#MyAppId}
AppName={#MyAppName}
AppVersion={#MyAppVersion}
AppVerName={#MyAppAliasName}
AppPublisher={#MyAppPublisher}
AppPublisherURL={#MyAppURL}
AppSupportURL={#MyAppURL}
AppUpdatesURL={#MyAppURL}
DefaultDirName={pf}\{#MyAppName}
LicenseFile={#LicenseFilePath}
OutputDir={#OutputPath}
OutputBaseFilename={#OutputFileName}
SetupIcOnFile={#SetupIconFilePath}
Compression=lzma
SolidCompression=yes
PrivilegesRequired=admin
Uninstallable=yes
UninstallDisplayName={#MyAppAliasName}
DefaultGroupName={#MyAppAliasName}
[Tasks]
Name: "desktopicon"; Description: "{cm:CreateDesktopIcon}"; GroupDescription: "{cm:AdditionalIcons}"; Flags: checkedonce
[Files]
Source: {#SourceMain}; DestDir: "{app}"; Flags: ignoreversion
Source: {#SourceFolder}; DestDir: "{app}"; Flags: ignoreversion recursesubdirs createallsubdirs
[Messages]
SetupAppTitle={#MyAppAliasName} setup wizard
SetupWindowTitle={#MyAppAliasName} setup wizard
[Icons]
Name: "{commondesktop}\{#MyAppAliasName}"; Filename: "{app}\{#MyAppExeName}"; Tasks: desktopicon
Name: "{group}\{#MyAppAliasName}"; Filename: "{app}\{#MyAppExeName}"
Name: "{group}\uninstall {#MyAppAliasName}"; Filename: "{uninstallexe}"
[Run]
Filename: "{app}\{#MyAppExeName}"; Description: "{cm:LaunchProgram,{#StringChange(MyAppName, '&', '&&')}}"; Flags: nowait postinstall skipifsilent
仔细的你能够已发明了这内里很多 _name_ 之类的东西,这玩意将要被 Node.js 替换成项目设置的信息,不须要每次手动改写这个庞杂的 iss 文件。
那句话咋说的来着,设置大于商定。23333333
在 ./config/index.js 文件中加上 build.nw.setup 字段,来设置要打包出来的运用的信息。
    nw: {
      // ...
      setup: {
        issPath: resolve('./config/setup.iss'),  // 就是上面谁人 iss
        files: path.resolve('./output', tmpJson.name + ' - v' + tmpJson.version),  // 要打包的文件目次
        outputPath: resolve('./output/setup/'),
        outputFileName: '${name}-${version}-${platform}-setup',  // 供应 name、version、platform 三个字段举行自定义输出文件名设置
        resourcesPath: resolve('./build/setup_resources'),  // 上面没说的打包用的 license 和 logo。拜见 https://github.com/anchengjian/vue-nw-seed/tree/master/build/setup_resources
        appPublisher: 'vue-nw-seed, Inc.',
        appURL: 'https://github.com/anchengjian/vue-nw-seed',
        appId: '{{A448363D-3A2F-4800-B62D-8A1C4D8F1115}'  // 假如有就写上
      }
    }
./build/build-win-setup.js这个文件就是用来打包 windows 下装置包的。。。
var innosetupCompiler = require('innosetup-compiler')
var path = require('path')
var fs = require('fs')
var icOnv= require('iconv-lite')
var rootPath = path.resolve(__dirname, '../')
// `./package.json`
var tmpJson = require(path.resolve(rootPath, './package.json'))
// get config
var cOnfig= require(path.resolve(rootPath, 'config'))
var setupOptiOns= config.build.nw.setup
fs.readdir(setupOptions.files, function(err, files) {
  if (err) throw err
  files.forEach(function(fileName) {
    if (!~fileName.indexOf('win')) return
    const curPath = path.resolve(setupOptions.files, fileName)
    fs.stat(curPath, function(err, stats) {
      if (err || stats.isFile()) return
      if (stats.isDirectory()) {
        makeExeSetup(Object.assign({}, setupOptions, { files: curPath, platform: fileName }))
      }
    })
  })
})
function makeExeSetup(opt) {
  const { issPath, files, outputPath, outputFileName, resourcesPath, appPublisher, appURL, appId, platform } = opt
  const { name, appName, version } = tmpJson
  const tmpIssPath = path.resolve(path.parse(issPath).dir, '_tmp.iss')
  return new Promise(function(resolve, reject) {
    // rewrite name, version to iss
    fs.readFile(issPath, null, function(err, text) {
      if (err) return reject(err)
      let str = iconv.decode(text, 'gbk')
        .replace(/_name_/g, name)
        .replace(/_appName_/g, appName)
        .replace(/_version_/g, version)
        .replace(/_outputPath_/g, outputPath)
        .replace(/_outputFileName_/g, getOutputName(outputFileName, { name, version, platform }))
        .replace(/_filesPath_/g, files)
        .replace(/_resourcesPath_/g, resourcesPath)
        .replace(/_appPublisher_/g, appPublisher)
        .replace(/_appURL_/g, appURL)
        .replace(/_appId_/g, appId)
      fs.writeFile(tmpIssPath, iconv.encode(str, 'gbk'), null, function(err) {
        if (err) return reject(err)
        // inno setup start
        innosetupCompiler(tmpIssPath, { gui: false, verbose: true }, function(err) {
          fs.unlinkSync(tmpIssPath)
          if (err) return reject(err)
          resolve(opt)
        })
      })
    })
  })
}
function getOutputName(str, data) {
  return str.replace(/\$\{(.*?)\}/g, function(a, b) {
    return data[b] || b
  })
}
在我们上文提到的打包 NW 运用的谁人文件中 ./build/build-nw.js 中的末了打包完成的回调里加个挪用进口
    // build windows setup
    if (config.build.noSetup) return
    if (~config.build.nw.builder.platforms.toString().indexOf('win')) require('./build-win-setup.js')
此次简约吧,4 部就完成了打包。
来看结果。
原文延续更新: https://github.com/anchengjian/anchengjian.github.io/blob/master/posts/2017/vuejs-webpack-nwjs-2.md,同时,假如对您有效,帮我点个 star 吧,写这玩意不容易啊。
假如你真的看到这儿了,我也就输了。。。
那就趁便看看 vue-nw-seed 这个项目吧,内里包含了我这篇文章里的一切的点和一些别的优化。
愿望另有其他需求的朋侪能够提 issue 或许私信议论
感谢!您的支撑是我继承更新下去的动力。


 京公网安备 11010802041100号 | 京ICP备19059560号-4 | PHP1.CN 第一PHP社区 版权所有