上一篇文章讲了Netty的理论基础,这一篇讲一下Netty在项目中的应用场景之一:消息推送功能,可以满足给所有用户推送,也可以满足给指定某一个用户推送消息,创建的是SpringBoot项目,后台服务端使用Netty技术,前端页面使用WebSocket技术。
大概实现思路:
下面是具体的代码实现,基本上每一步操作都配有注释说明,配合注释看应该还是比较容易理解的。
第零步:引入Netty的依赖,和一个工具包(只用到了json工具,可用其他json工具代替)
 io.netty
 netty-all
 4.1.33.Final


 cn.hutool
 hutool-all
 5.2.3
第一步:在NettyConfig中定义一个channel组,管理所有的channel,再定义一个map,管理用户与channel的对应关系。
package com.sixj.nettypush.config;

import io.netty.channel.Channel;
import io.netty.channel.group.ChannelGroup;
import io.netty.channel.group.DefaultChannelGroup;
import io.netty.util.concurrent.GlobalEventExecutor;

import java.util.concurrent.ConcurrentHashMap;

/**
 * @author sixiaojie
 * @date 2020-03-28-15:07
 */
public class NettyConfig {
  /**
   * 定义一个channel组,管理所有的channel
   * GlobalEventExecutor.INSTANCE 是全局的事件执行器,是一个单例
   */
  private static ChannelGroup channelGroup = new DefaultChannelGroup(GlobalEventExecutor.INSTANCE);

  /**
   * 存放用户与Chanel的对应信息,用于给指定用户发送消息
   */
  private static ConcurrentHashMap userChannelMap = new ConcurrentHashMap<>();

  private NettyConfig() {}

  /**
   * 获取channel组
   * @return
   */
  public static ChannelGroup getChannelGroup() {
    return channelGroup;
  }

  /**
   * 获取用户channel map
   * @return
   */
  public static ConcurrentHashMap getUserChannelMap(){
    return userChannelMap;
  }
}
第二步:创建NettyServer,定义两个EventLoopGroup,bossGroup辅助客户端的tcp连接请求, workGroup负责与客户端之前的读写操作,需要说明的是,需要开启一个新的线程来执行netty server,要不然会阻塞主线程,到时候就无法调用项目的其他controller接口了。
package com.sixj.nettypush.websocket;
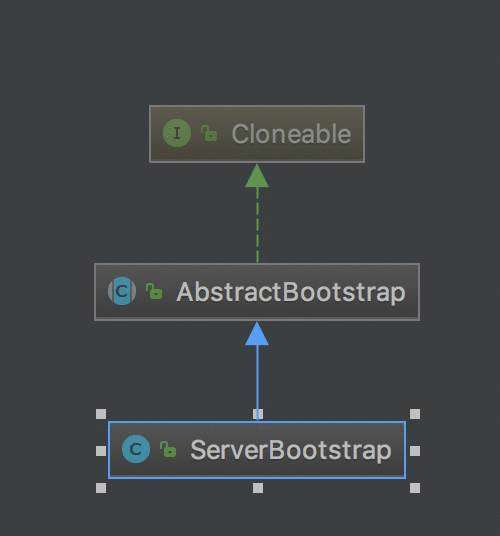
import io.netty.bootstrap.ServerBootstrap;
import io.netty.channel.ChannelFuture;
import io.netty.channel.ChannelInitializer;
import io.netty.channel.EventLoopGroup;
import io.netty.channel.nio.NioEventLoopGroup;
import io.netty.channel.socket.SocketChannel;
import io.netty.channel.socket.nio.NioServerSocketChannel;
import io.netty.handler.codec.http.HttpObjectAggregator;
import io.netty.handler.codec.http.HttpServerCodec;
import io.netty.handler.codec.http.websocketx.WebSocketServerProtocolHandler;
import io.netty.handler.codec.serialization.ObjectEncoder;
import io.netty.handler.stream.ChunkedWriteHandler;
import org.slf4j.Logger;
import org.slf4j.LoggerFactory;
import org.springframework.beans.factory.annotation.Autowired;
import org.springframework.beans.factory.annotation.Value;
import org.springframework.stereotype.Component;
import javax.annotation.PostConstruct;
import javax.annotation.PreDestroy;
import java.net.InetSocketAddress;
/**
* @author sixiaojie
* @date 2020-03-28-13:44
*/
@Component
public class NettyServer{
private static final Logger log = LoggerFactory.getLogger(NettyServer.class);
/**
* webSocket协议名
*/
private static final String WEBSOCKET_PROTOCOL = "WebSocket";
/**
* 端口号
*/
@Value("${webSocket.netty.port:58080}")
private int port;
/**
* webSocket路径
*/
@Value("${webSocket.netty.path:/webSocket}")
private String webSocketPath;
@Autowired
private WebSocketHandler webSocketHandler;
private EventLoopGroup bossGroup;
private EventLoopGroup workGroup;
/**
* 启动
* @throws InterruptedException
*/
private void start() throws InterruptedException {
bossGroup = new NioEventLoopGroup();
workGroup = new NioEventLoopGroup();
ServerBootstrap bootstrap = new ServerBootstrap();
// bossGroup辅助客户端的tcp连接请求, workGroup负责与客户端之前的读写操作
bootstrap.group(bossGroup,workGroup);
// 设置NIO类型的channel
bootstrap.channel(NioServerSocketChannel.class);
// 设置监听端口
bootstrap.localAddress(new InetSocketAddress(port));
// 连接到达时会创建一个通道
bootstrap.childHandler(new ChannelInitializer() {
@Override
protected void initChannel(SocketChannel ch) throws Exception {
// 流水线管理通道中的处理程序(Handler),用来处理业务
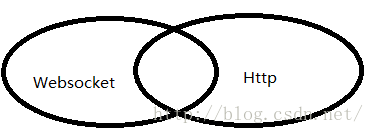
// webSocket协议本身是基于http协议的,所以这边也要使用http编解码器
ch.pipeline().addLast(new HttpServerCodec());
ch.pipeline().addLast(new ObjectEncoder());
// 以块的方式来写的处理器
ch.pipeline().addLast(new ChunkedWriteHandler());
/*
说明:
1、http数据在传输过程中是分段的,HttpObjectAggregator可以将多个段聚合
2、这就是为什么,当浏览器发送大量数据时,就会发送多次http请求
*/
ch.pipeline().addLast(new HttpObjectAggregator(8192));
/*
说明:
1、对应webSocket,它的数据是以帧(frame)的形式传递
2、浏览器请求时 ws://localhost:58080/xxx 表示请求的uri
3、核心功能是将http协议升级为ws协议,保持长连接
*/
ch.pipeline().addLast(new WebSocketServerProtocolHandler(webSocketPath, WEBSOCKET_PROTOCOL, true, 65536 * 10));
// 自定义的handler,处理业务逻辑
ch.pipeline().addLast(webSocketHandler);
}
});
// 配置完成,开始绑定server,通过调用sync同步方法阻塞直到绑定成功
ChannelFuture channelFuture = bootstrap.bind().sync();
log.info("Server started and listen on:{}",channelFuture.channel().localAddress());
// 对关闭通道进行监听
channelFuture.channel().closeFuture().sync();
}
/**
* 释放资源
* @throws InterruptedException
*/
@PreDestroy
public void destroy() throws InterruptedException {
if(bossGroup != null){
bossGroup.shutdownGracefully().sync();
}
if(workGroup != null){
workGroup.shutdownGracefully().sync();
}
}
@PostConstruct()
public void init() {
//需要开启一个新的线程来执行netty server 服务器
new Thread(() -> {
try {
start();
} catch (InterruptedException e) {
e.printStackTrace();
}
}).start();
}
}
第三步: 具体实现业务的WebSocketHandler,具体实现逻辑看注释
package com.sixj.nettypush.websocket; import cn.hutool.json.JSONObject; import cn.hutool.json.JSONUtil; import com.sixj.nettypush.config.NettyConfig; import io.netty.channel.ChannelHandler; import io.netty.channel.ChannelHandlerContext; import io.netty.channel.SimpleChannelInboundHandler; import io.netty.handler.codec.http.websocketx.TextWebSocketFrame; import io.netty.util.AttributeKey; import org.slf4j.Logger; import org.slf4j.LoggerFactory; import org.springframework.stereotype.Component; /** * TextWebSocketFrame类型, 表示一个文本帧 * @author sixiaojie * @date 2020-03-28-13:47 */ @Component @ChannelHandler.Sharable public class WebSocketHandler extends SimpleChannelInboundHandler{ private static final Logger log = LoggerFactory.getLogger(NettyServer.class); /** * 一旦连接,第一个被执行 * @param ctx * @throws Exception */ @Override public void handlerAdded(ChannelHandlerContext ctx) throws Exception { log.info("handlerAdded 被调用"+ctx.channel().id().asLongText()); // 添加到channelGroup 通道组 NettyConfig.getChannelGroup().add(ctx.channel()); } /** * 读取数据 */ @Override protected void channelRead0(ChannelHandlerContext ctx, TextWebSocketFrame msg) throws Exception { log.info("服务器收到消息:{}",msg.text()); // 获取用户ID,关联channel JSONObject jsOnObject= JSONUtil.parseObj(msg.text()); String uid = jsonObject.getStr("uid"); NettyConfig.getUserChannelMap().put(uid,ctx.channel()); // 将用户ID作为自定义属性加入到channel中,方便随时channel中获取用户ID AttributeKey key = AttributeKey.valueOf("userId"); ctx.channel().attr(key).setIfAbsent(uid); // 回复消息 ctx.channel().writeAndFlush(new TextWebSocketFrame("服务器连接成功!")); } @Override public void handlerRemoved(ChannelHandlerContext ctx) throws Exception { log.info("handlerRemoved 被调用"+ctx.channel().id().asLongText()); // 删除通道 NettyConfig.getChannelGroup().remove(ctx.channel()); removeUserId(ctx); } @Override public void exceptionCaught(ChannelHandlerContext ctx, Throwable cause) throws Exception { log.info("异常:{}",cause.getMessage()); // 删除通道 NettyConfig.getChannelGroup().remove(ctx.channel()); removeUserId(ctx); ctx.close(); } /** * 删除用户与channel的对应关系 * @param ctx */ private void removeUserId(ChannelHandlerContext ctx){ AttributeKey key = AttributeKey.valueOf("userId"); String userId = ctx.channel().attr(key).get(); NettyConfig.getUserChannelMap().remove(userId); } } **第四步:**具体消息推送的接口 public interface PushService { /** * 推送给指定用户 * @param userId * @param msg */ void pushMsgToOne(String userId,String msg); /** * 推送给所有用户 * @param msg */ void pushMsgToAll(String msg); }
接口实现类:
import java.util.concurrent.ConcurrentHashMap;

/**
 * @author sixiaojie
 * @date 2020-03-30-20:10
 */
@Service
public class PushServiceImpl implements PushService {

  @Override
  public void pushMsgToOne(String userId, String msg){
    ConcurrentHashMap userChannelMap = NettyConfig.getUserChannelMap();
    Channel channel = userChannelMap.get(userId);
    channel.writeAndFlush(new TextWebSocketFrame(msg));
  }
  @Override
  public void pushMsgToAll(String msg){
    NettyConfig.getChannelGroup().writeAndFlush(new TextWebSocketFrame(msg));
  }
}
controller:
package com.sixj.nettypush.controller;

import com.sixj.nettypush.service.PushService;
import org.springframework.beans.factory.annotation.Autowired;
import org.springframework.web.bind.annotation.PostMapping;
import org.springframework.web.bind.annotation.RequestMapping;
import org.springframework.web.bind.annotation.RequestParam;
import org.springframework.web.bind.annotation.RestController;

/**
 * @author sixiaojie
 * @date 2020-03-30-20:08
 */
@RestController
@RequestMapping("/push")
public class PushController {

  @Autowired
  private PushService pushService;

  /**
   * 推送给所有用户
   * @param msg
   */
  @PostMapping("/pushAll")
  public void pushToAll(@RequestParam("msg") String msg){
    pushService.pushMsgToAll(msg);
  }
  /**
   * 推送给指定用户
   * @param userId
   * @param msg
   */
  @PostMapping("/pushOne")
  public void pushMsgToOne(@RequestParam("userId") String userId,@RequestParam("msg") String msg){
    pushService.pushMsgToOne(userId,msg);
  }
}
第五步:前端html页面
目前为止,所有代码已经写完了,测试一下
首先运行这个html文件,会看到服务端给前端返回的消息“服务器连接成功了!”,后端日志会打印服务器收到消息:{"uid":"123456"}

然后使用postman测试推送的接口

测试成功,打完收工
到此这篇关于SpringBoot+WebSocket+Netty实现消息推送的示例代码的文章就介绍到这了,更多相关SpringBoot+WebSocket+Netty消息推送内容请搜索以前的文章或继续浏览下面的相关文章希望大家以后多多支持!


 京公网安备 11010802041100号 | 京ICP备19059560号-4 | PHP1.CN 第一PHP社区 版权所有