在Spring中实现依赖注入有两种方式,分别是通过注解的方式和通过xml的方式,以下案例是在Spring3.x版本进行讲解。
一、使用注解的方式实现IOC
1.1、导入Spring类库
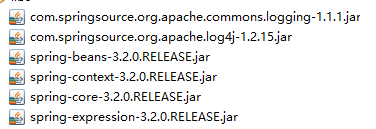
1.2、编写数据访问层DAO
这里面只是提供了一个空的类,我们的目的是为了测试在Service层中是否可以成功的将这个Dao类注入。通过@Repository注解来标注Dao
package com.dao;import org.springframework.stereotype.Repository;/*** * 配置DAO* * @author thinkpad**/
@Repository("userDao")
public class UserDao {}
1.3、编写服务层Service
我们通过@Service注解来标注Service
package com.service;import javax.annotation.PostConstruct;
import javax.annotation.PreDestroy;
import javax.annotation.Resource;import org.springframework.beans.factory.annotation.Value;
import org.springframework.context.annotation.Scope;
import org.springframework.stereotype.Service;import com.dao.UserDao;/*** 配置Service* * @author thinkpad**/
@Service("userService")
@Scope("singleton") //单实例
//@Scope("prototype") //多实例
public class UserService {@Value("用户服务")private String info;// @Autowired// @Qualifier("userDao")@Resource(name = "userDao")private UserDao dao;/*** 初始化注解*/@PostConstructpublic void setup() {System.out.println("对象初始化");}/*** 销毁注解*/@PreDestroypublic void teardown() {System.out.println("对象销毁");}@Overridepublic String toString() {return "info:" + this.info + ",dao:" + this.dao;}
}
1.4、在applicationContext.xml中配置注解扫描
http://www.springframework.org/schema/beans http://www.springframework.org/schema/beans/spring-beans.xsd
http://www.springframework.org/schema/context http://www.springframework.org/schema/context/spring-context.xsd">
1.5、测试
package test;import org.junit.Test;
import org.springframework.context.support.ClassPathXmlApplicationContext;import com.service.UserService;public class JTest {@Testpublic void test1() {ClassPathXmlApplicationContext ctx = new ClassPathXmlApplicationContext("applicationContext.xml");UserService en = (UserService) ctx.getBean("userService");System.out.println(en);UserService en2 = (UserService) ctx.getBean("userService");System.out.println(en.equals(en2));ctx.close();}}
1.6、运行结果

二、使用XML的方式实现IOC
1.1、导入Spring类库
1.2、要注入的实体对象
package test.entity;public class EntityInner {private String name;public void setName(String name) {this.name = name;}public String getName() {return name;}@Overridepublic String toString() {return "Inner姓名:" + this.name;}}package test.entity;public class Entity1 {private String name;public Entity1(String name) {this.name = name;}@Overridepublic String toString() {return "姓名:" + this.name;}
}package test.entity;public class Entity2 {private String name;public void setName(String name) {this.name = name;}@Overridepublic String toString() {return "姓名:" + this.name;}
}package test.entity;public class Entity3 {private String name;private EntityInner inner;public void setName(String name) {this.name = name;}public void setInner(EntityInner inner) {this.inner = inner;}@Overridepublic String toString() {return "姓名:"+this.name + ",inner:"+this.inner.toString();}
}package test.entity;import java.util.List;
import java.util.Map;
import java.util.Properties;public class Entity4 {private List cities;private Map persons;private Properties users;public List getCities() {return cities;}public void setCities(List cities) {this.cities = cities;}public Map getPersons() {return persons;}public void setPersons(Map persons) {this.persons = persons;}public Properties getUsers() {return users;}public void setUsers(Properties users) {this.users = users;}}
1.3、在applicationContext.xml中配置注解扫描
applicationContext.xml
applicationContext2.xml
北京上海杭州
admin123456
1.4、测试
package test;import org.junit.Test;
import org.springframework.context.ApplicationContext;
import org.springframework.context.support.ClassPathXmlApplicationContext;import test.entity.Entity1;
import test.entity.Entity2;
import test.entity.Entity3;
import test.entity.Entity4;public class JTest {/*** 通过Setter方法注入依赖对象*/@Testpublic void test1() {ApplicationContext cxt = new ClassPathXmlApplicationContext("applicationContext.xml");Entity1 en = (Entity1) cxt.getBean("entity2");System.out.println(en.toString());}/*** 通过构造器注入依赖对象*/@Testpublic void test1_1() {ApplicationContext cxt = new ClassPathXmlApplicationContext("applicationContext.xml");Entity2 en = (Entity2) cxt.getBean("entity1");System.out.println(en.toString());}/*** 注入实体*/@Testpublic void test2() {ApplicationContext cxt = new ClassPathXmlApplicationContext("applicationContext.xml");Entity3 en = (Entity3) cxt.getBean("entity5");System.out.println(en.toString());}/*** 注入集合*/@Testpublic void test3() {ApplicationContext cxt = new ClassPathXmlApplicationContext("applicationContext.xml");Entity4 en = (Entity4) cxt.getBean("entity6");System.out.println(en.getCities());System.out.println(en.getPersons());System.out.println(en.getUsers());}
}
四、源代码
Spring通过注解实现IOC
Spring通过xml实现IOC


 京公网安备 11010802041100号