1、更新yum 源
[root@bogon ~]# yum -y update
2、安装软件
yum install httpd mysql-server php php-mysql php-gd php-imap php-ldap php-odbc php-pear php-xml php-xmlrpc -y
3、查看php版本
php -version
如果低于5.6则卸载:
查看php版本命令:
#php -v
这个命令是删除不干净的
#yum remove php
因为使用这个命令以后再用
#php -v
还是会看到有版本信息的。。。。。
必须强制删除
#rpm -qa|grep php
提示如下
#php-pdo-5.1.6-27.el5_5.3
#php-mysql-5.1.6-27.el5_5.3
#php-xml-5.1.6-27.el5_5.3
#php-cli-5.1.6-27.el5_5.3
#php-common-5.1.6-27.el5_5.3
#php-gd-5.1.6-27.el5_5.3
//卸载php相关所有的
rpm -qa | grep php | xargs rpm -e
//https://www.inqingdao.cn/737.html
注意卸载要先卸载没有依赖的
pdo是mysql的依赖项;common是gd的依赖项;
例如:# rpm -e php-pdo-5.1.6-27.el5_5.3
error: Failed dependencies:
? ? ? ? php-pdo is needed by (installed) php-mysql-5.1.6-27.el5_5.3.i386
所以正确的卸载顺序是:
rpm -e php-mysql-5.1.6-27.el5_5.3?
rpm -e php-pdo-5.1.6-27.el5_5.3?
rpm -e php-xml-5.1.6-27.el5_5.3?
rpm -e php-cli-5.1.6-27.el5_5.3?
rpm -e php-gd-5.1.6-27.el5_5.3?
rpm -e php-common-5.1.6-27.el5_5.3?
再用# php -v
查看版本信息已经没有提示
更新php的yum源:
rpm -Uvh http://mirror.webtatic.com/yum/el6/latest.rpm
安装新版php环境
#yum install php56w.x86_64 php56w-cli.x86_64 php56w-common.x86_64 php56w-gd.x86_64 php56w-ldap.x86_64 php56w-mbstring.x86_64 php56w-mysql.x86_64 php56w-pdo.x86_64 php56w-odbc.x86_64 php56w-xml.x86_64 php56w-xmlrpc.x86_64 php56w-soap.x86_64
4、启动httpd服务:
[root@Shining ~]# service httpd start
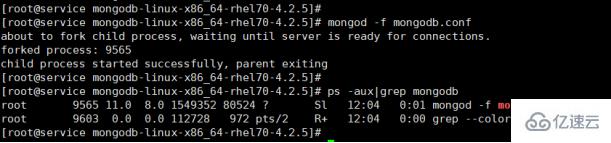
5、启动Mysql服务
[root@localhost init.d]# service mysqld start
查看端口 ss -tnl
安装完之后开启MySQL服务:
进入mysql
[root@Shining ~]# mysql
配置数据库数据
为WordPress在MySQL中创建一个DB及相关用户
#登录MYSQL
[root@bogon html]# service mysqld restart
Stopping mysqld: [ OK ]
Initializing MySQL database:
WARNING: The host ‘bogon’ could not be looked up with resolveip.
This probably means that your libc libraries are not 100 % compatible
with this binary MySQL version. The MySQL daemon, mysqld, should work
normally with the exception that host name resolving will not work.
This means that you should use IP addresses instead of hostnames
when specifying MySQL privileges !
Installing MySQL system tables…
OK
Filling help tables…
OK
To start mysqld at boot time you have to copy
support-files/mysql.server to the right place for your system
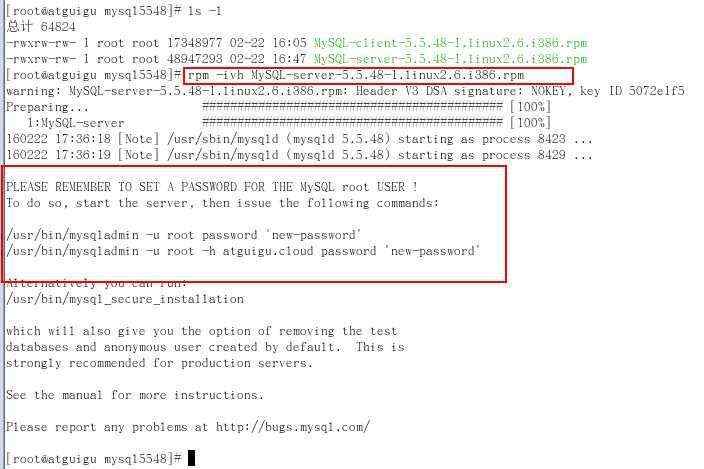
PLEASE REMEMBER TO SET A PASSWORD FOR THE MySQL root USER !
To do so, start the server, then issue the following commands:
/usr/bin/mysqladmin -u root password ‘new-password’
/usr/bin/mysqladmin -u root -h bogon password ‘new-password’
Alternatively you can run:
/usr/bin/mysql_secure_installation
which will also give you the option of removing the test
databases and anonymous user created by default. This is
strongly recommended for production servers.
See the manual for more instructions.
You can start the MySQL daemon with:
cd /usr ; /usr/bin/mysqld_safe &
You can test the MySQL daemon with mysql-test-run.pl
cd /usr/mysql-test ; perl mysql-test-run.pl
Please report any problems with the /usr/bin/mysqlbug script!
[ OK ]
Starting mysqld: [ OK ]
[root@bogon html]#
[root@bogon html]# mysql
Welcome to the MySQL monitor. Commands end with ; or \g.
Your MySQL connection id is 2
Server version: 5.1.73 Source distribution
Copyright © 2000, 2013, Oracle and/or its affiliates. All rights reserved.
Oracle is a registered trademark of Oracle Corporation and/or its
affiliates. Other names may be trademarks of their respective
owners.
Type ‘help;’ or ‘\h’ for help. Type ‘\c’ to clear the current input statement.
mysql> show databases;
±-------------------+
| Database |
±-------------------+
| information_schema |
| mysql |
| test |
±-------------------+
3 rows in set (0.00 sec)
mysql> create database wordpress;
Query OK, 1 row affected (0.00 sec)
mysql> show databases;
±-------------------+
| Database |
±-------------------+
| information_schema |
| mysql |
| test |
| wordpress |
±-------------------+
4 rows in set (0.00 sec)
mysql> create user wpuser@localhost;
Query OK, 0 rows affected (0.00 sec)
mysql> use mysql;
Reading table information for completion of table and column names
You can turn off this feature to get a quicker startup with -A
Database changed
mysql> select User from user;
±-------+
| User |
±-------+
| root |
| |
| root |
| |
| root |
| wpuser |
±-------+
6 rows in set (0.00 sec)
mysql> update user set password = password(“wppassword”) where User = ‘wpuser’;
Query OK, 1 row affected (0.00 sec)
Rows matched: 1 Changed: 1 Warnings: 0
mysql> GRANT ALL PRIVILEGES ON wordpress.* TO wpuser@localhost IDENTIFIED BY ‘wppassword’;
Query OK, 0 rows affected (0.00 sec)
mysql> flush privileges;
Query OK, 0 rows affected (0.00 sec)
mysql> exit;
Bye
6.配置WordPress
[root@bogon html]# cd /var/www/html
[root@bogon html]# cd wordpress/
[root@bogon wordpress]# cp wp-config-sample.php wp-config.php
[root@bogon wordpress]# vim wp-config.php
[root@bogon wordpress]#
/** WordPress数据库的名称 */
define(‘DB_NAME’,‘wordpress’);
/** MySQL数据库用户名 */
define(‘DB_USER’,‘wpuser’);
/** MySQL数据库密码 */
define(‘DB_PASSWORD’,‘wppassword’);


 京公网安备 11010802041100号